Create a Registration Form
This guide walks through building a B2B registration form — from creating it to enabling it for submissions. For the quick version, see Create your first registration form.
What is a registration form?
Section titled “What is a registration form?”A registration form lets storefront visitors submit a wholesale signup request. Each submission lands in the Submissions tab, where you approve it (assigning wholesale customer tags) or reject it. Approvals never create a Shopify B2B company — see Shopify B2B companies.
The Registrations page has three tabs: Forms (build and manage forms), Submissions (review signups), and Approval (manual or automatic approval mode).
Step 1: Create a new form
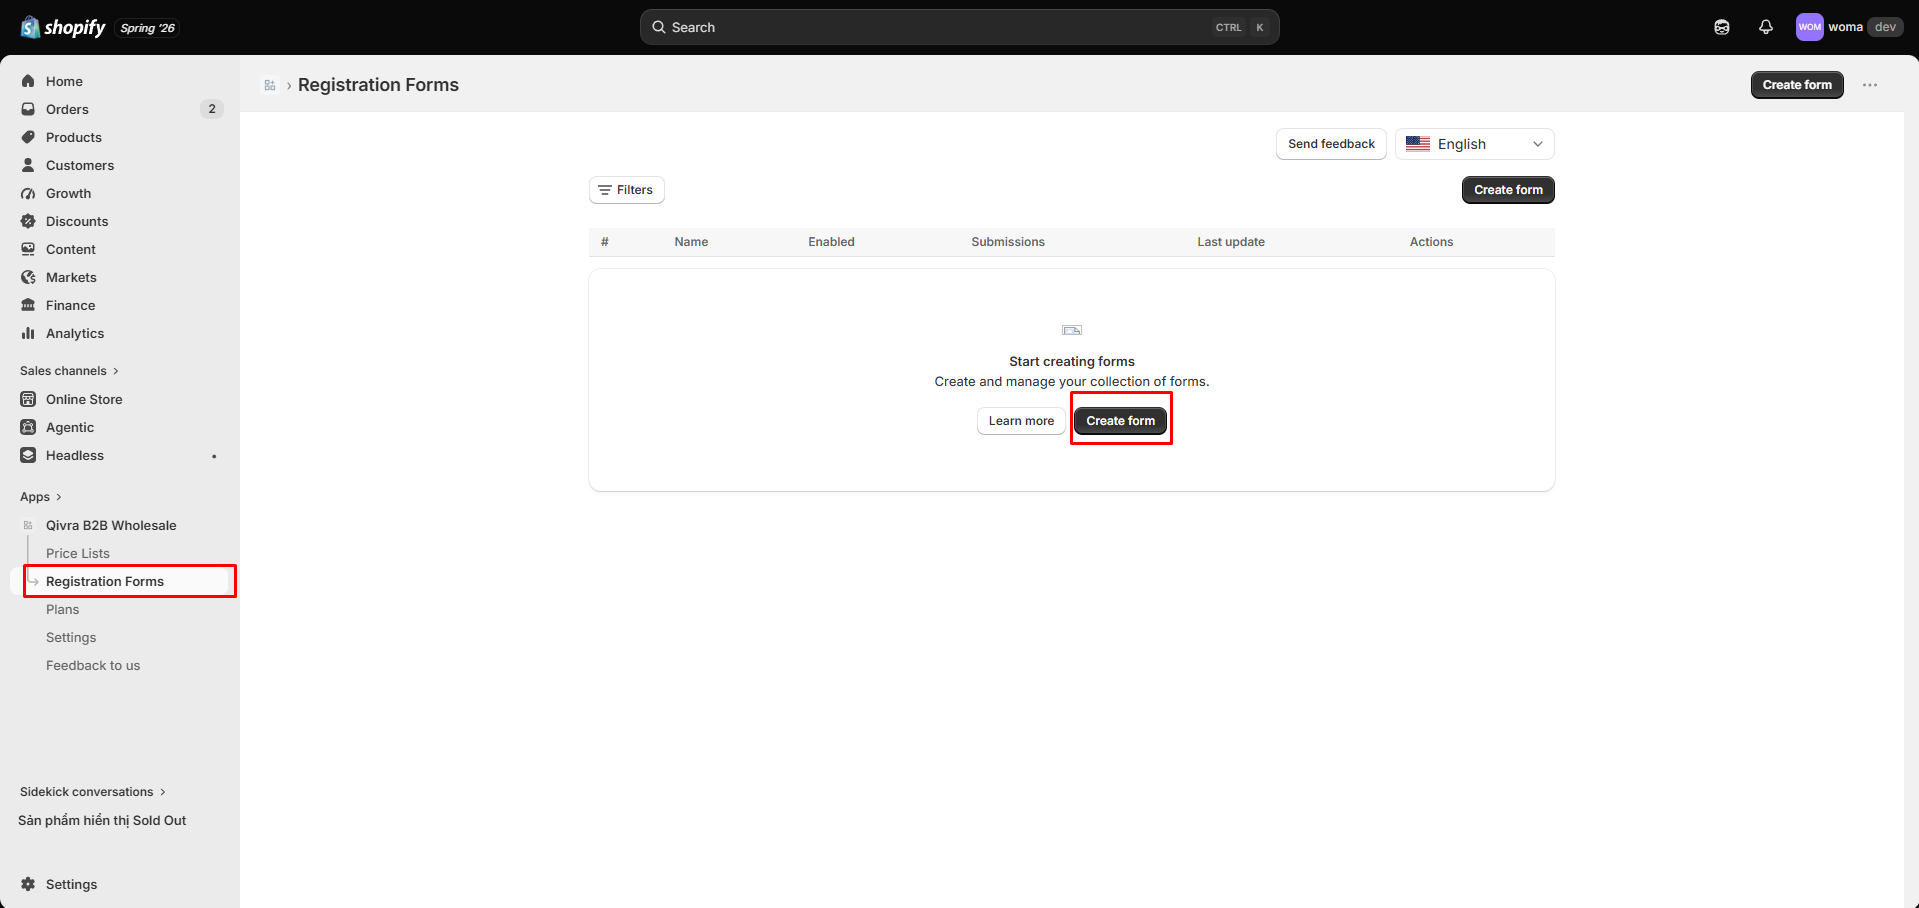
Section titled “Step 1: Create a new form”- Go to Registrations and open the Forms tab.
- Click New.
- The editor opens with the default template pre-filled.
You can also duplicate an existing form later from the list using Duplicate.
Step 2: Configure General info
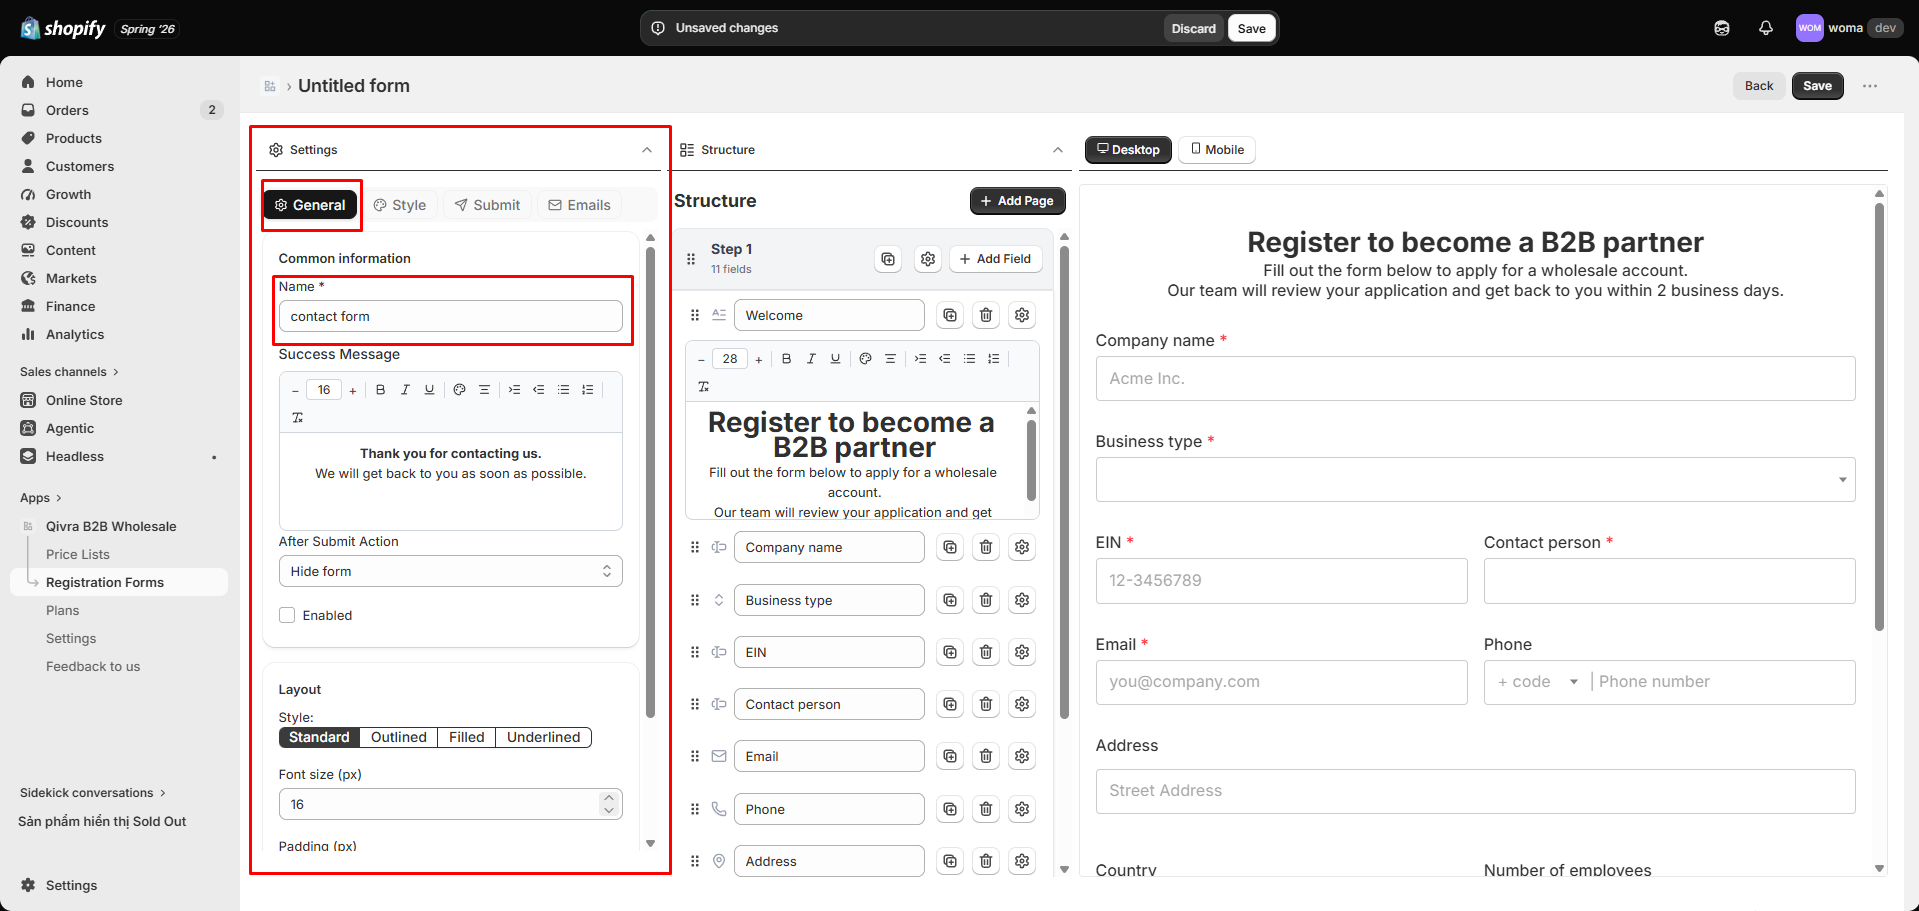
Section titled “Step 2: Configure General info”In the left Settings panel, open the General tab:
- Form name — internal label for the form.
- Description — shown above the form (optional).
Step 3: Build the structure
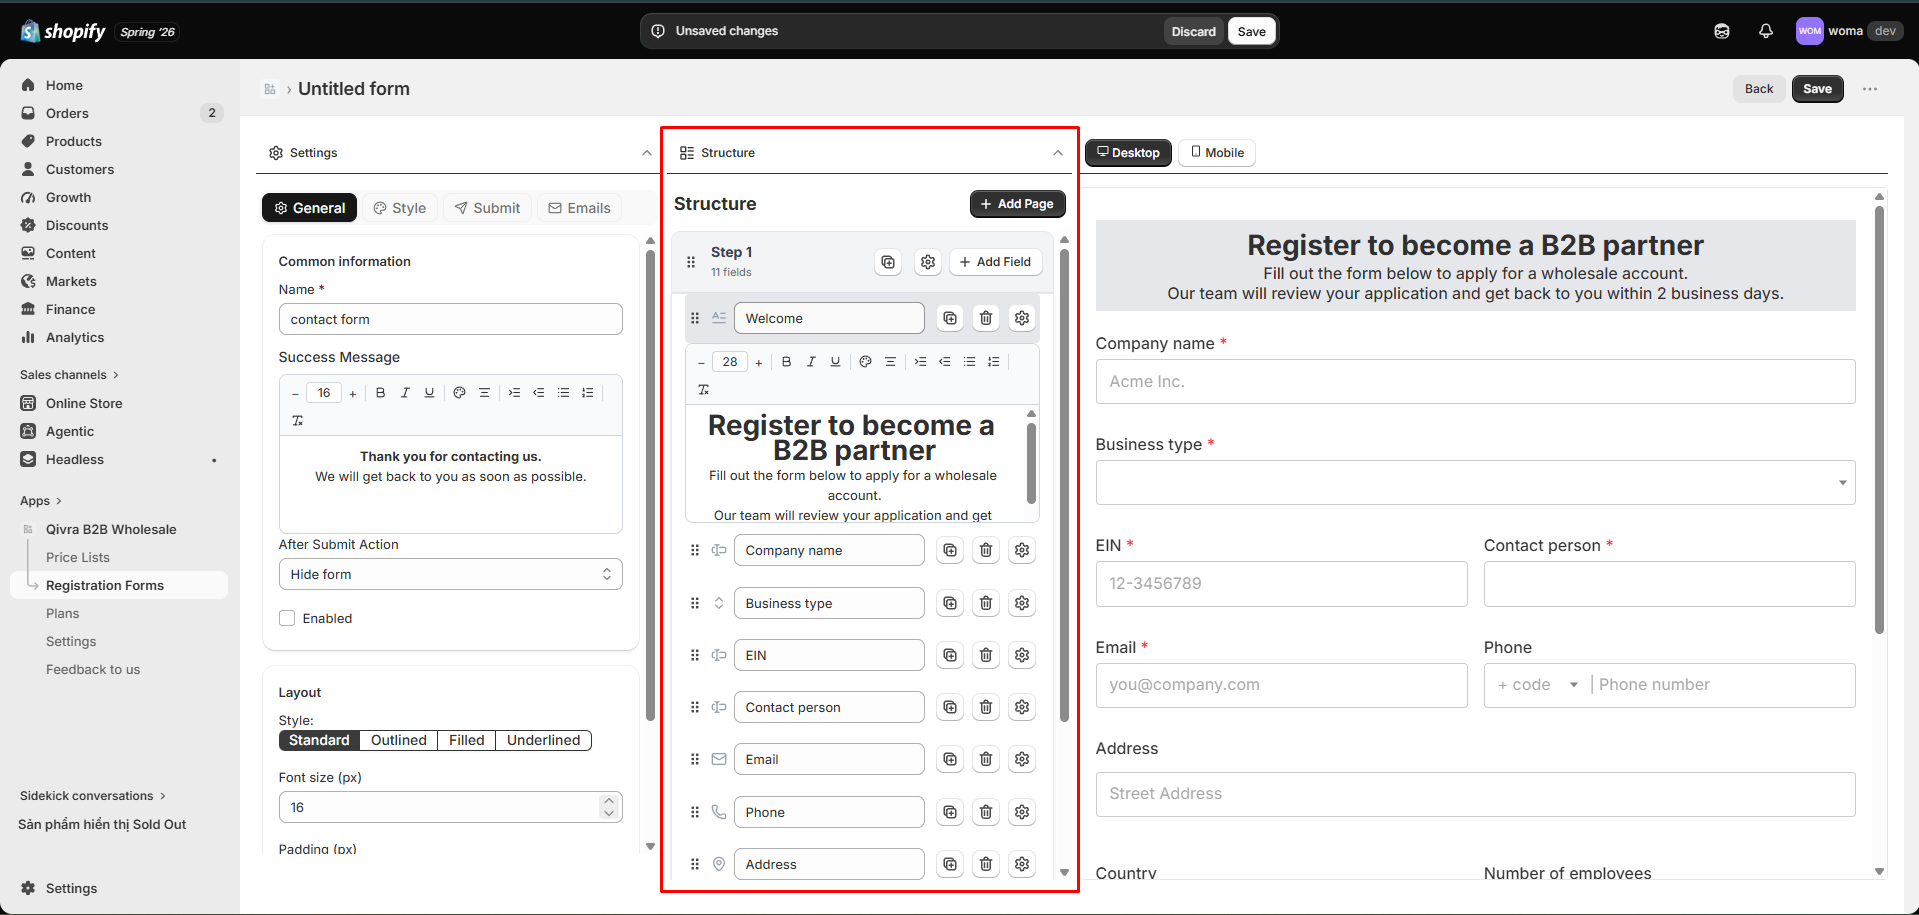
Section titled “Step 3: Build the structure”The middle Structure panel is where you compose fields. The default template already includes:
- Company name, Business type (dropdown), EIN
- Contact person, Email, Phone
- Address, Country
- Number of employees, Notes
Drag fields in or out, and click any field to edit it. Available field types:
| Category | Fields |
|---|---|
| Basic | Text, Email, Phone, Number, Date |
| Choice | Dropdown, Radio, Checkbox |
| Location | Address, Country |
| Layout | Text block, Divider, Spacer |
For every field’s settings, see Registration form fields.
Step 4: Style the form
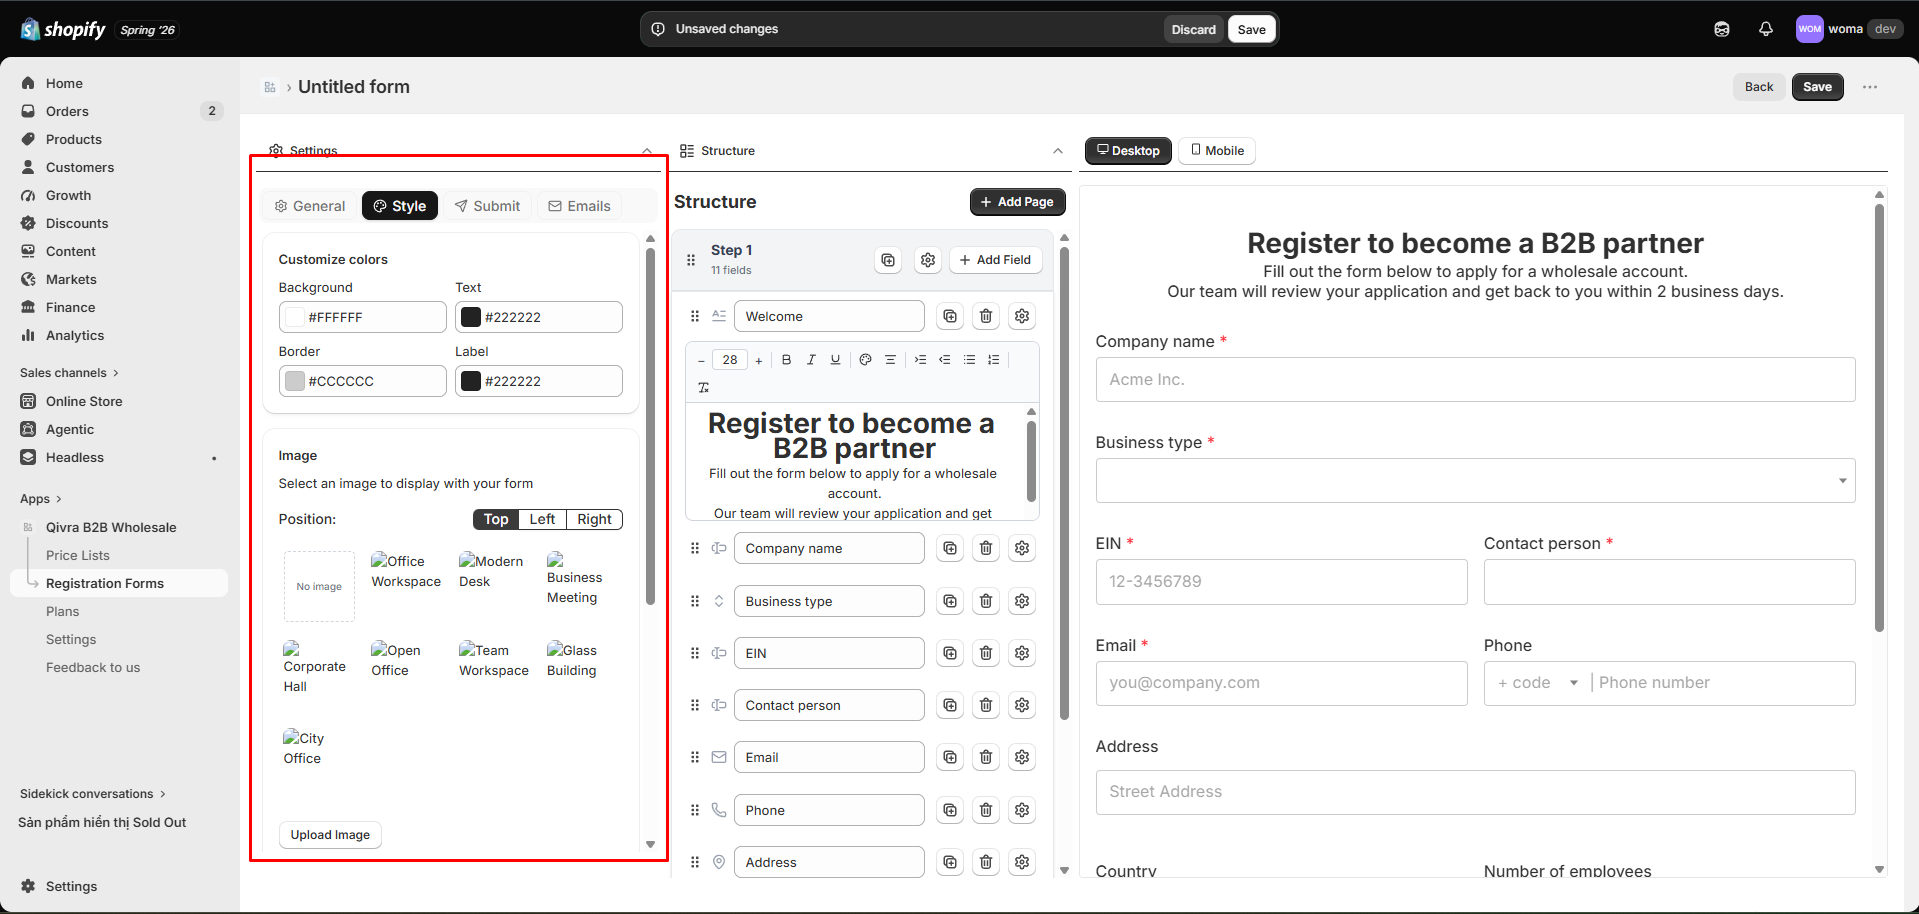
Section titled “Step 4: Style the form”Open the Style tab to customize the form look (colors, spacing, fonts) so it matches your storefront theme.
Step 5: Configure Submit and Emails
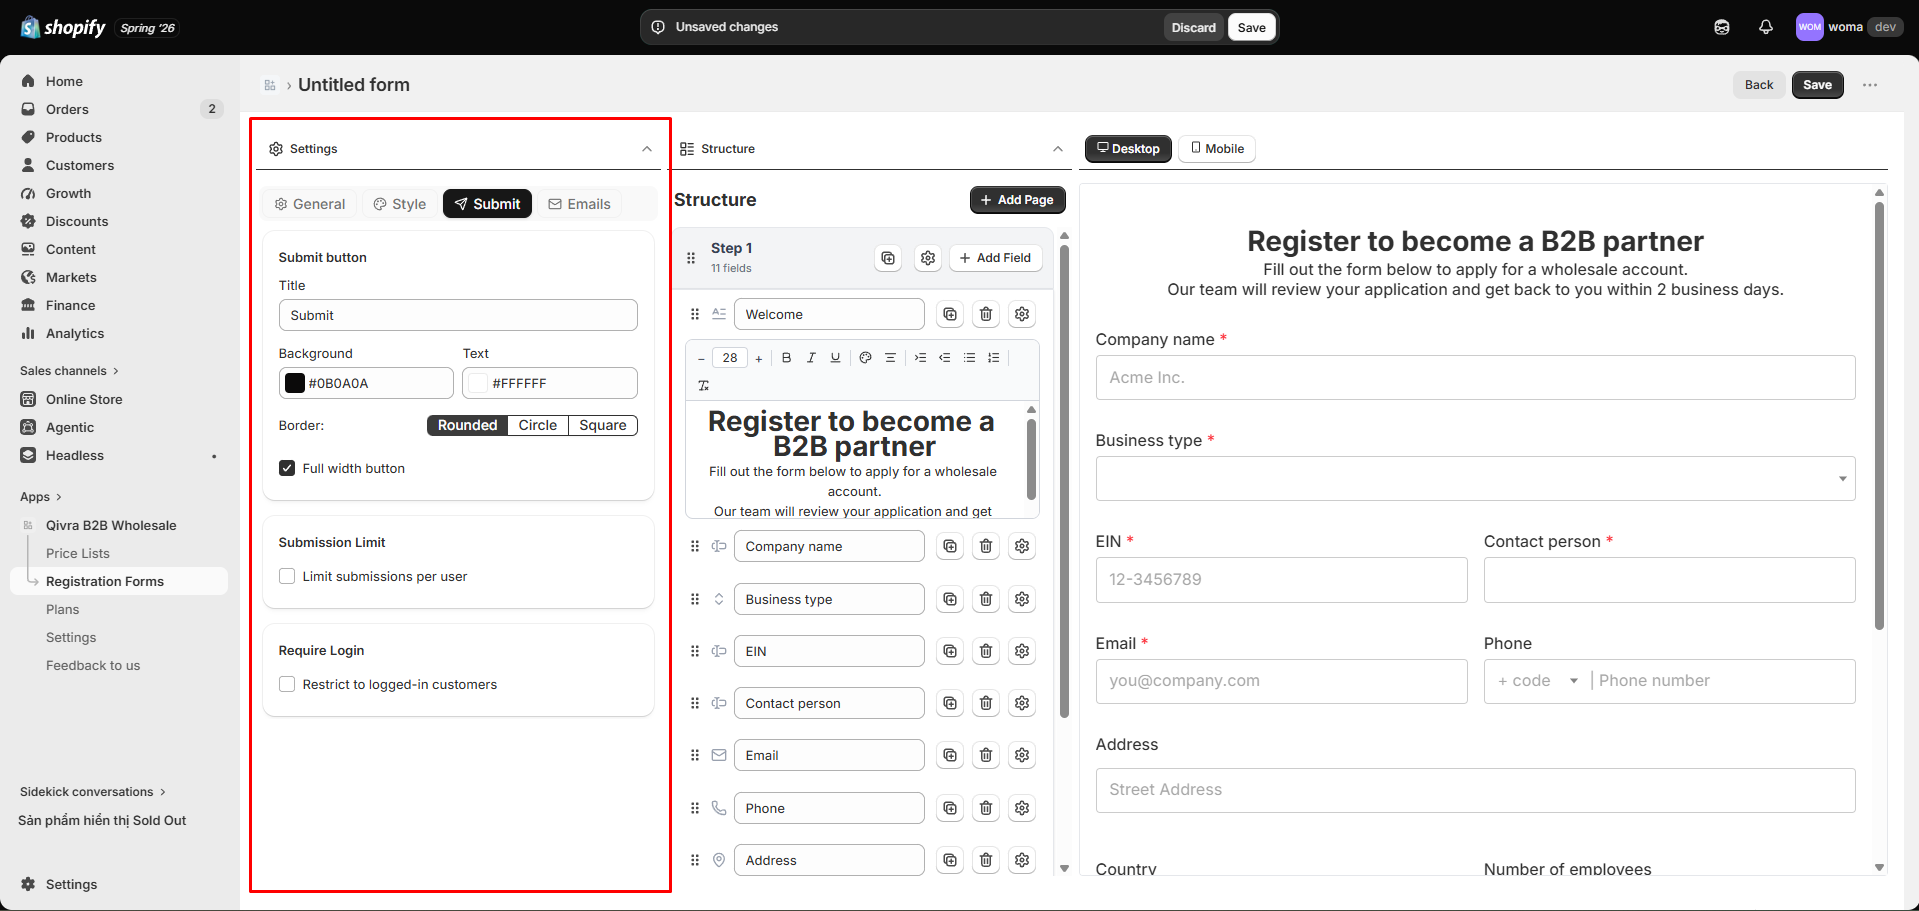
Section titled “Step 5: Configure Submit and Emails”- Submit tab — set the submit button text.
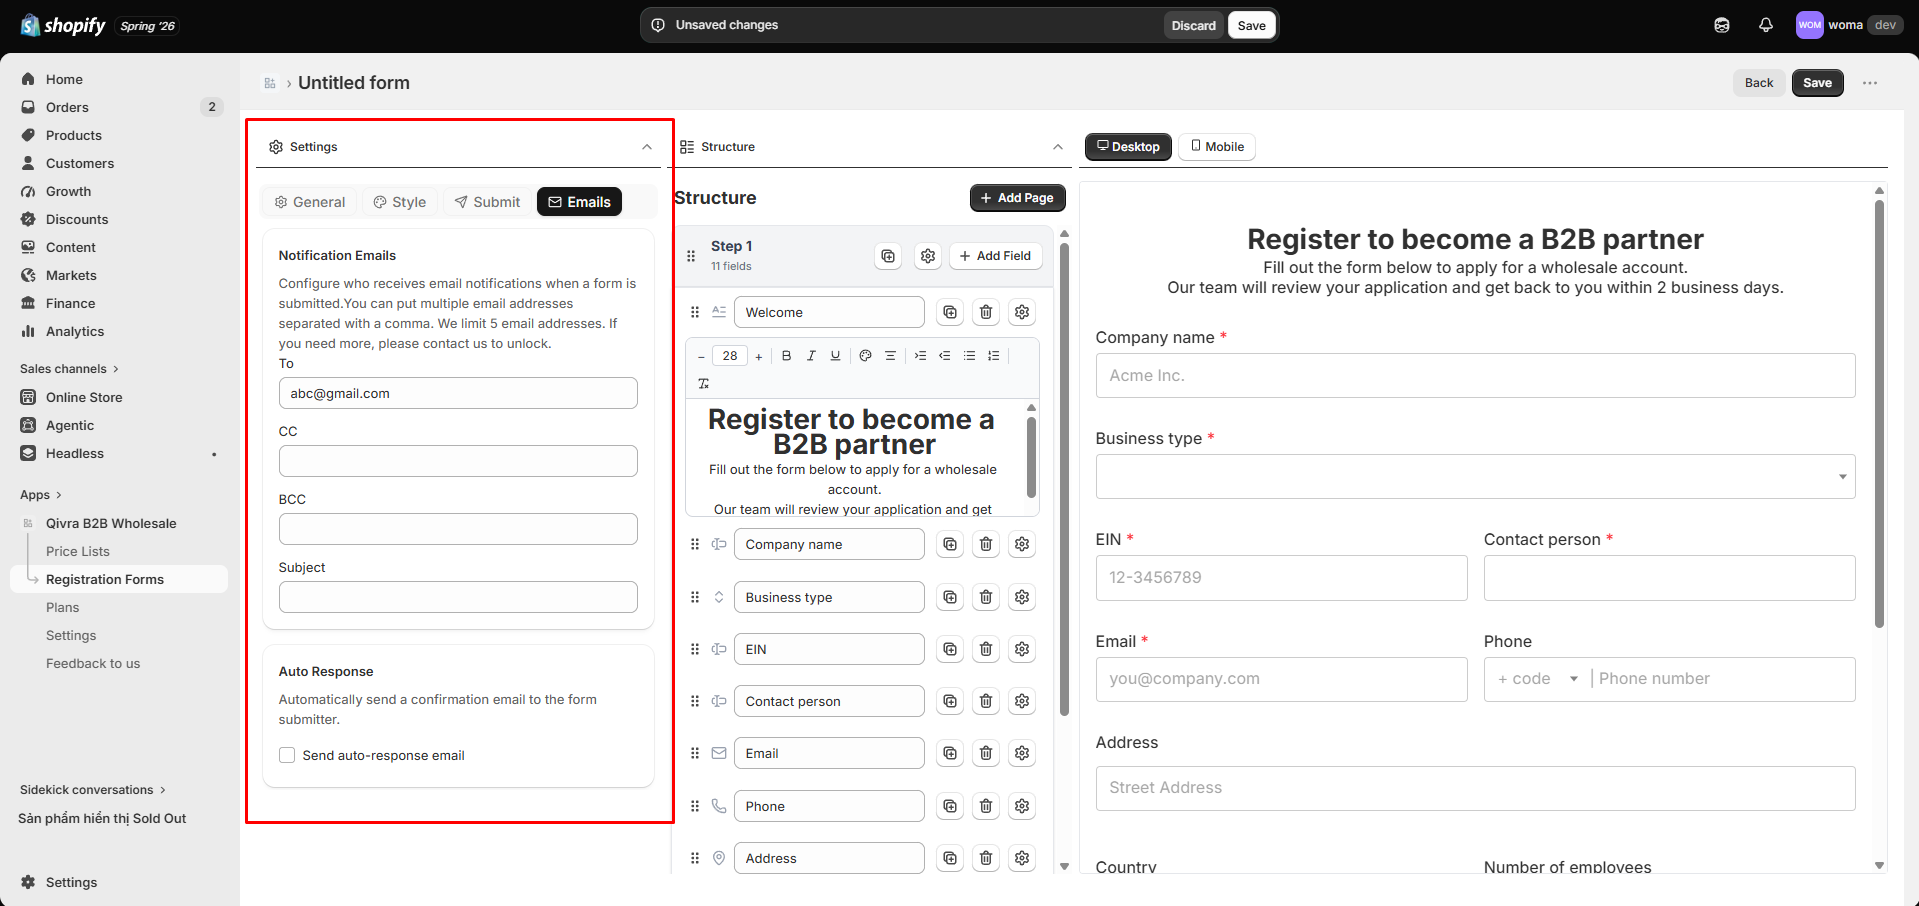
- Emails tab — set the recipient email for new submission alerts. Your shop owner email is pre-filled by default. Add team members who should be notified.
Step 6: Preview
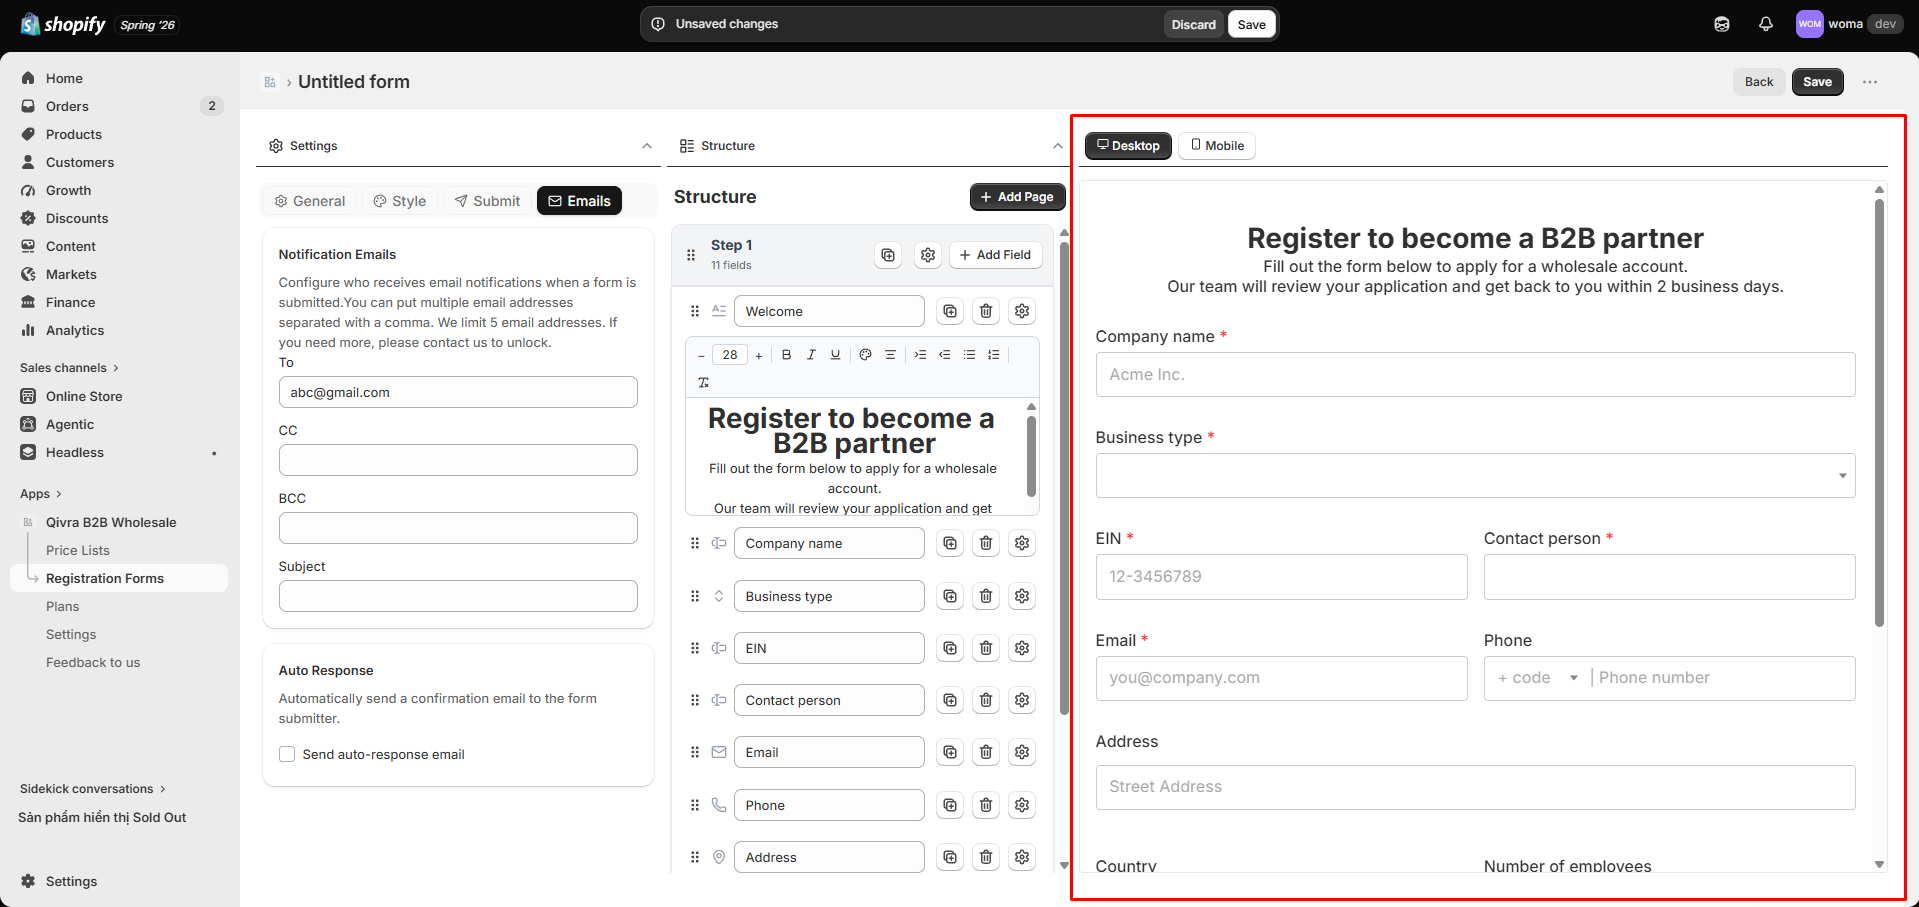
Section titled “Step 6: Preview”The right panel shows a live preview of the form as you edit. Toggle between desktop and mobile if available, and confirm the layout reads well before saving.
Step 7: Save and enable
Section titled “Step 7: Save and enable”- Click Save.
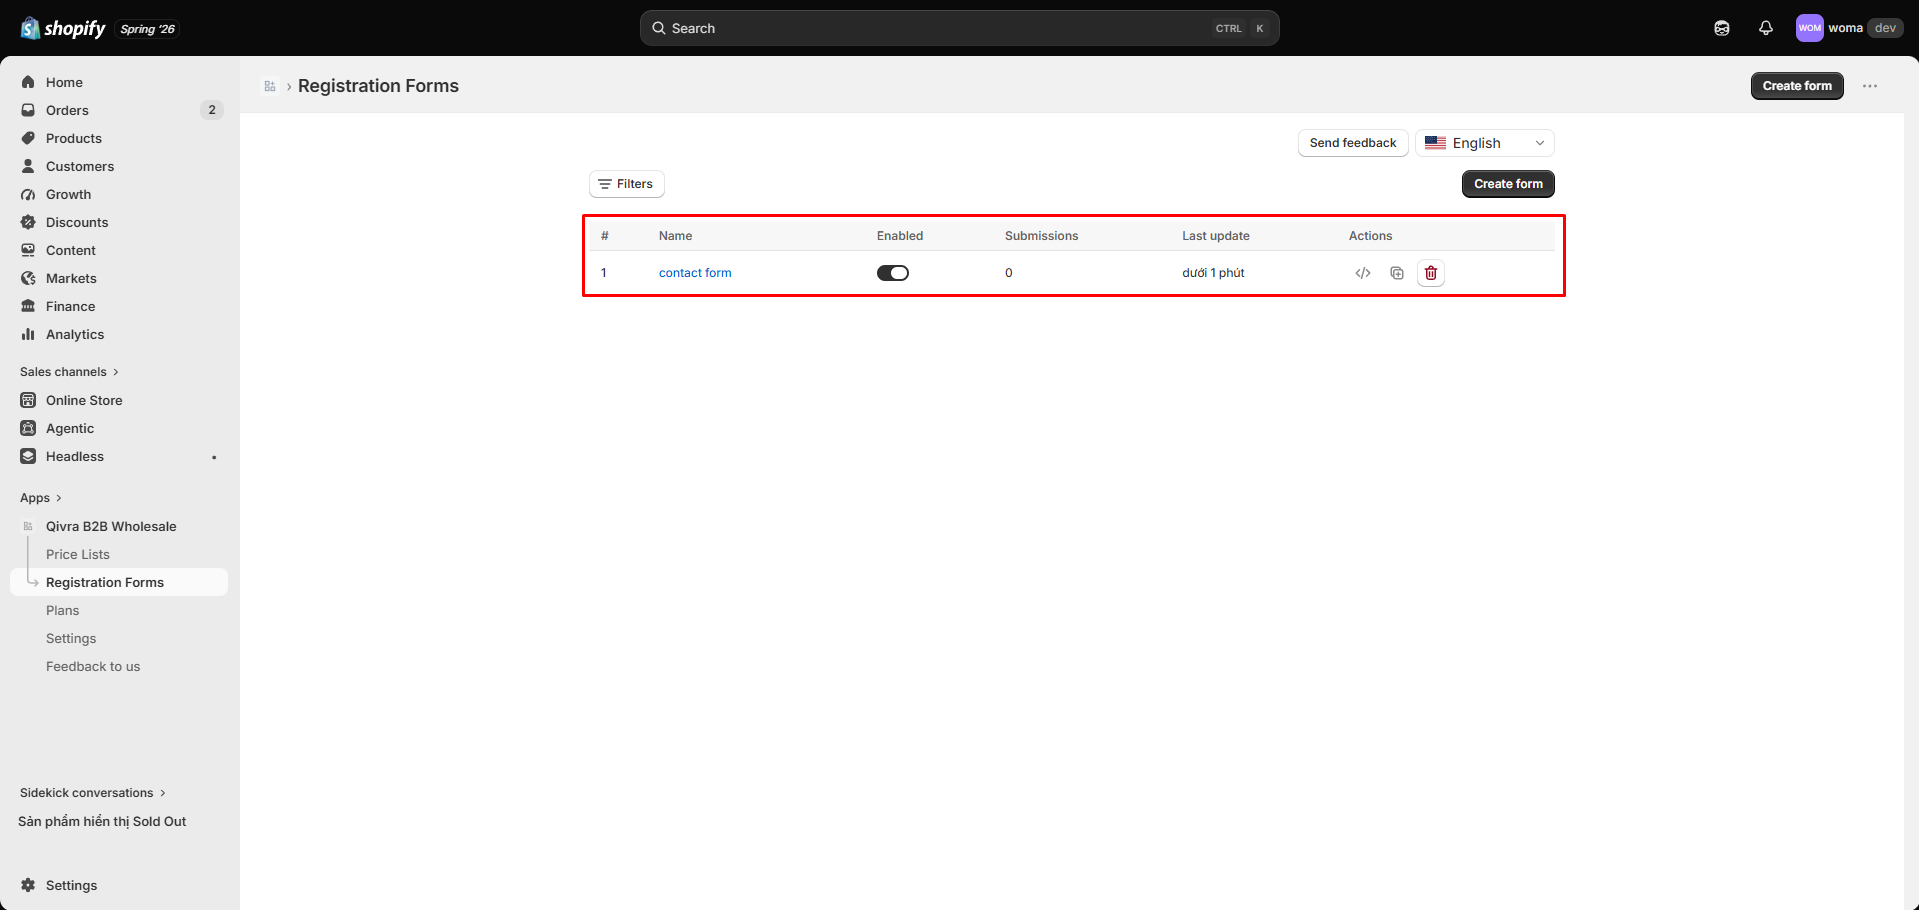
- Back in the registrations list, toggle the form Enabled.
A disabled form never accepts submissions, even if it is embedded on the store.
Step 8: Embed on your storefront
Section titled “Step 8: Embed on your storefront”Pick one of three display methods:
- Enable the app embed (required for all methods)
- Add via Theme Editor block
- Embed via shortcode
Plan limits apply: submissions are capped at 2,000 per billing period on Free, Basic, and Premium (unlimited on Ultimate). See Plans and billing.