Create Your First Price List
This guide walks through creating a price list end to end — the core feature of Qivra B2B Wholesale. A price list defines who gets a custom price, what products it applies to, and how the price is calculated.
What is a price list?
Section titled “What is a price list?”A price list is a collection of pricing rules targeting a specific audience and product set. When a customer matches the list’s conditions, the rules adjust their prices on your storefront and at checkout.
Each price list has four parts:
| Part | Purpose |
|---|---|
| General | Name, status, priority, effective period |
| Customers | Who sees the price (all, logged-in, guest, by tag, specific) |
| Markets | Which markets the price applies in |
| Products & rules | Which products, plus the discount or volume tiers |
Step 1: Open the editor
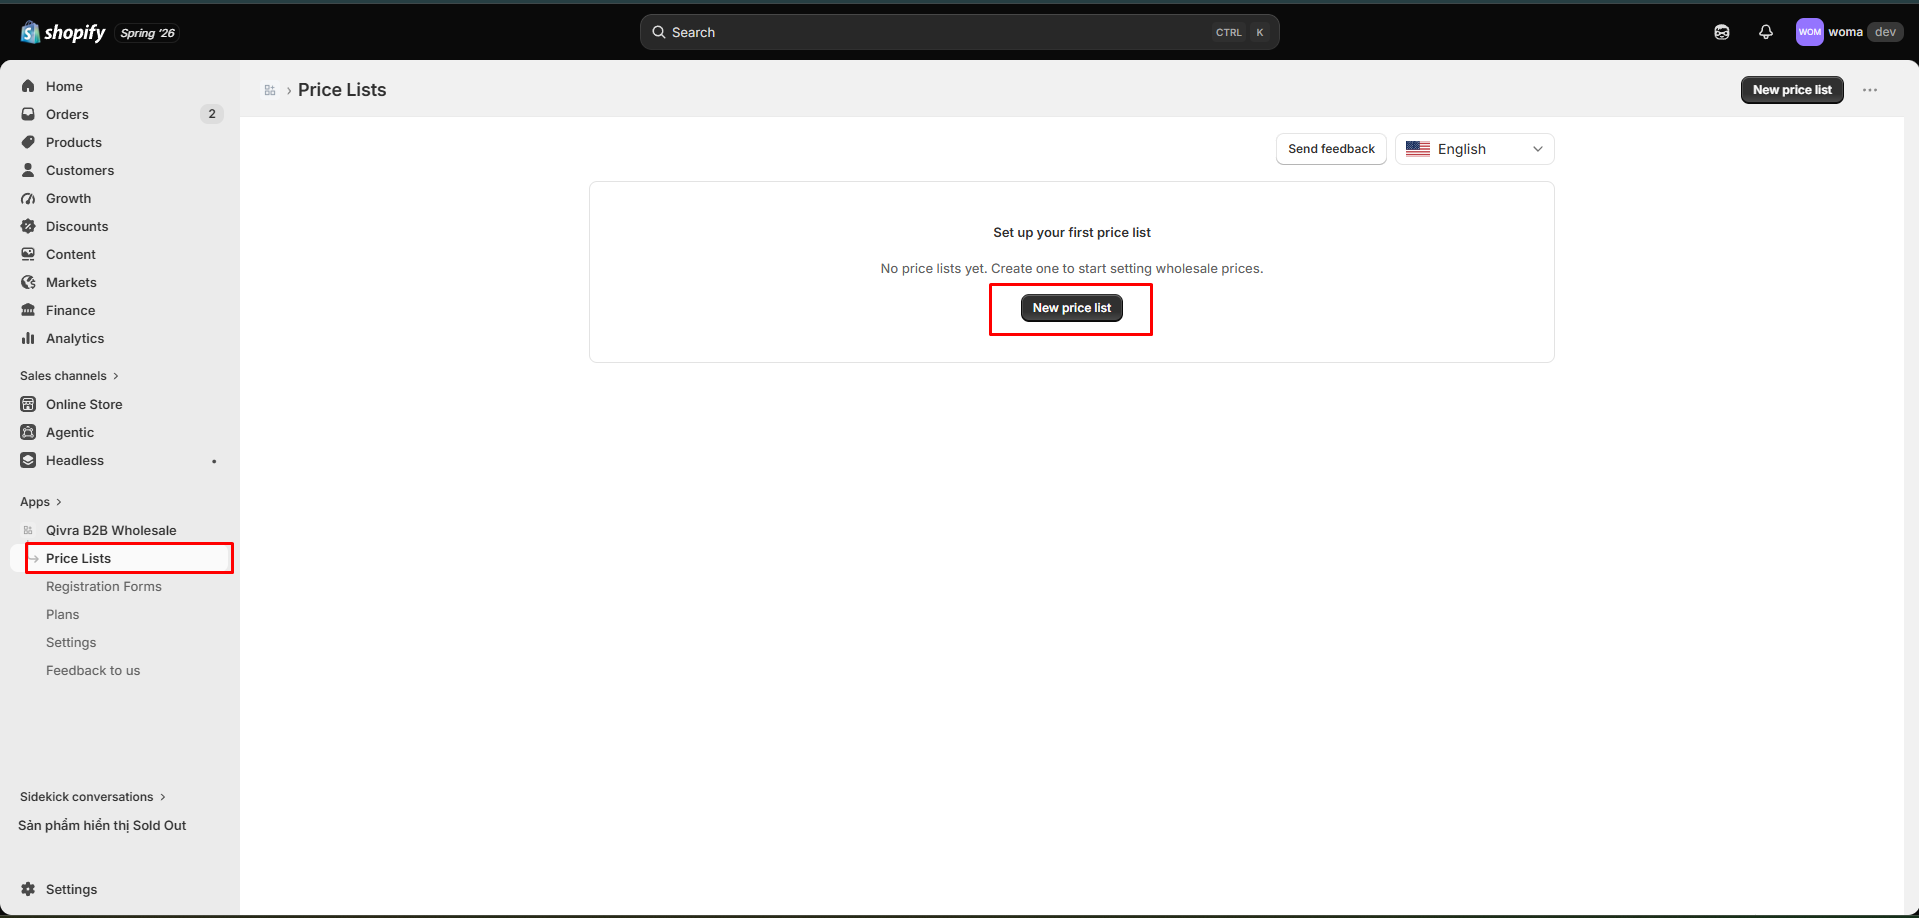
Section titled “Step 1: Open the editor”- Go to Price Lists in the app sidebar.
- Click New price list.
The editor opens with empty configuration tabs.
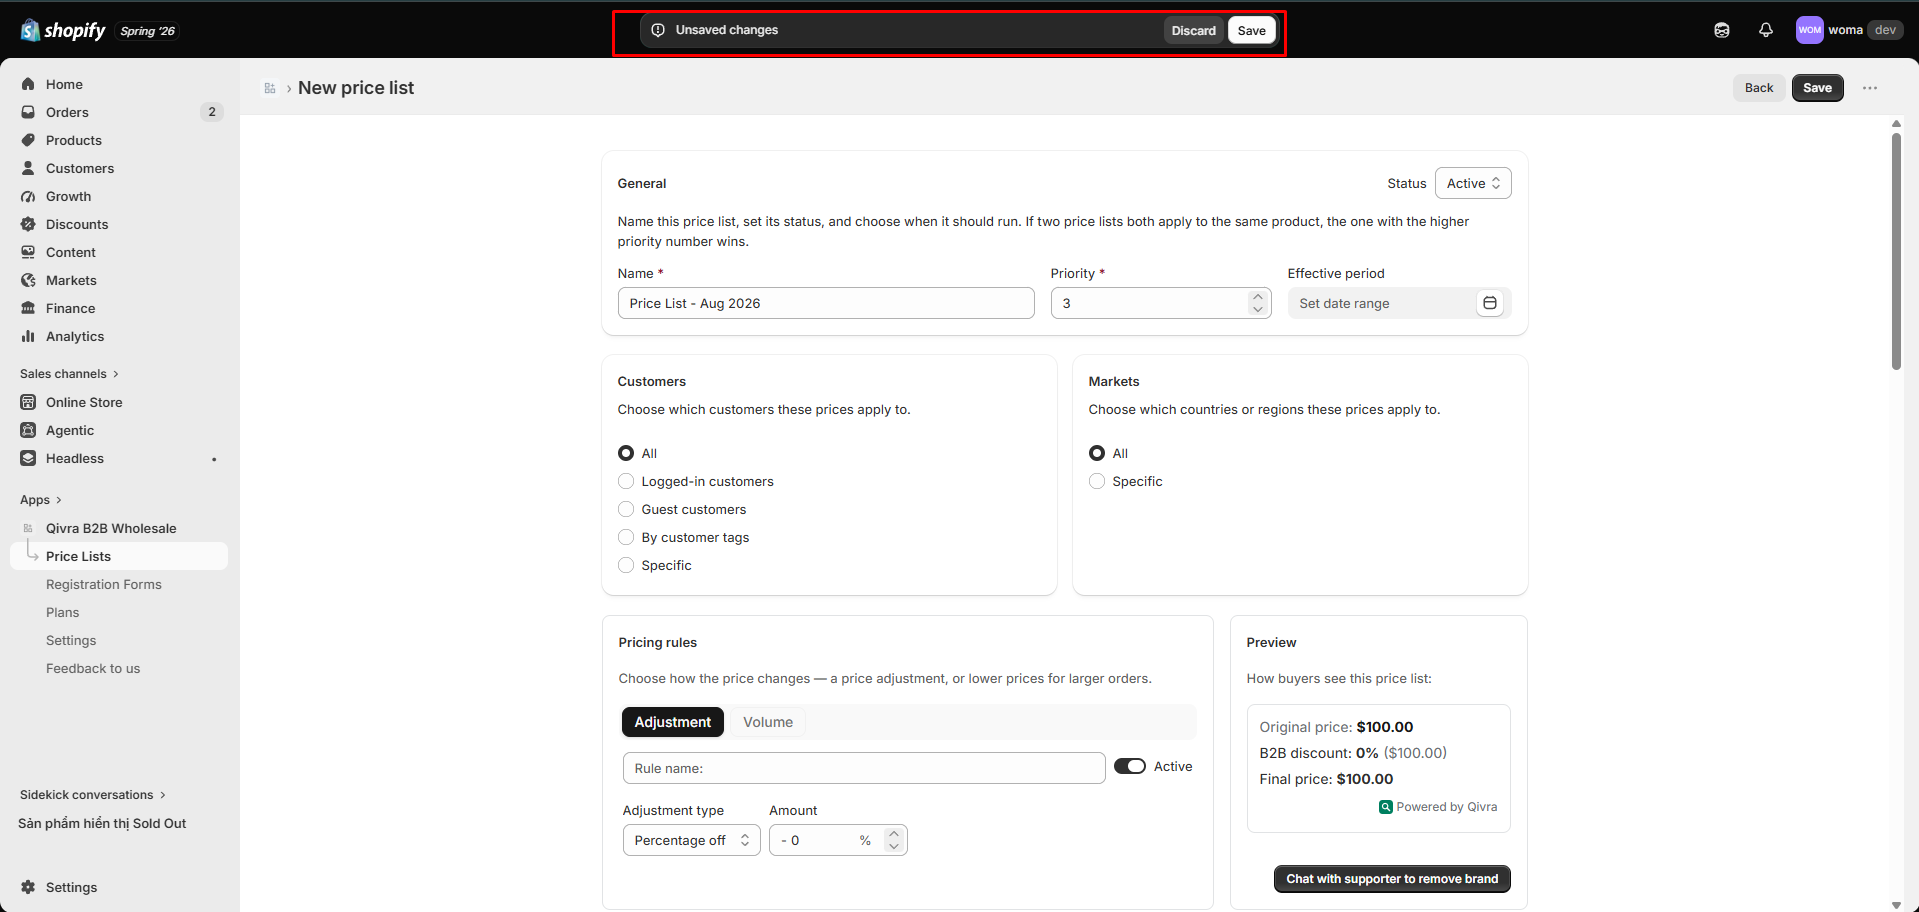
Step 2: Fill in the General settings
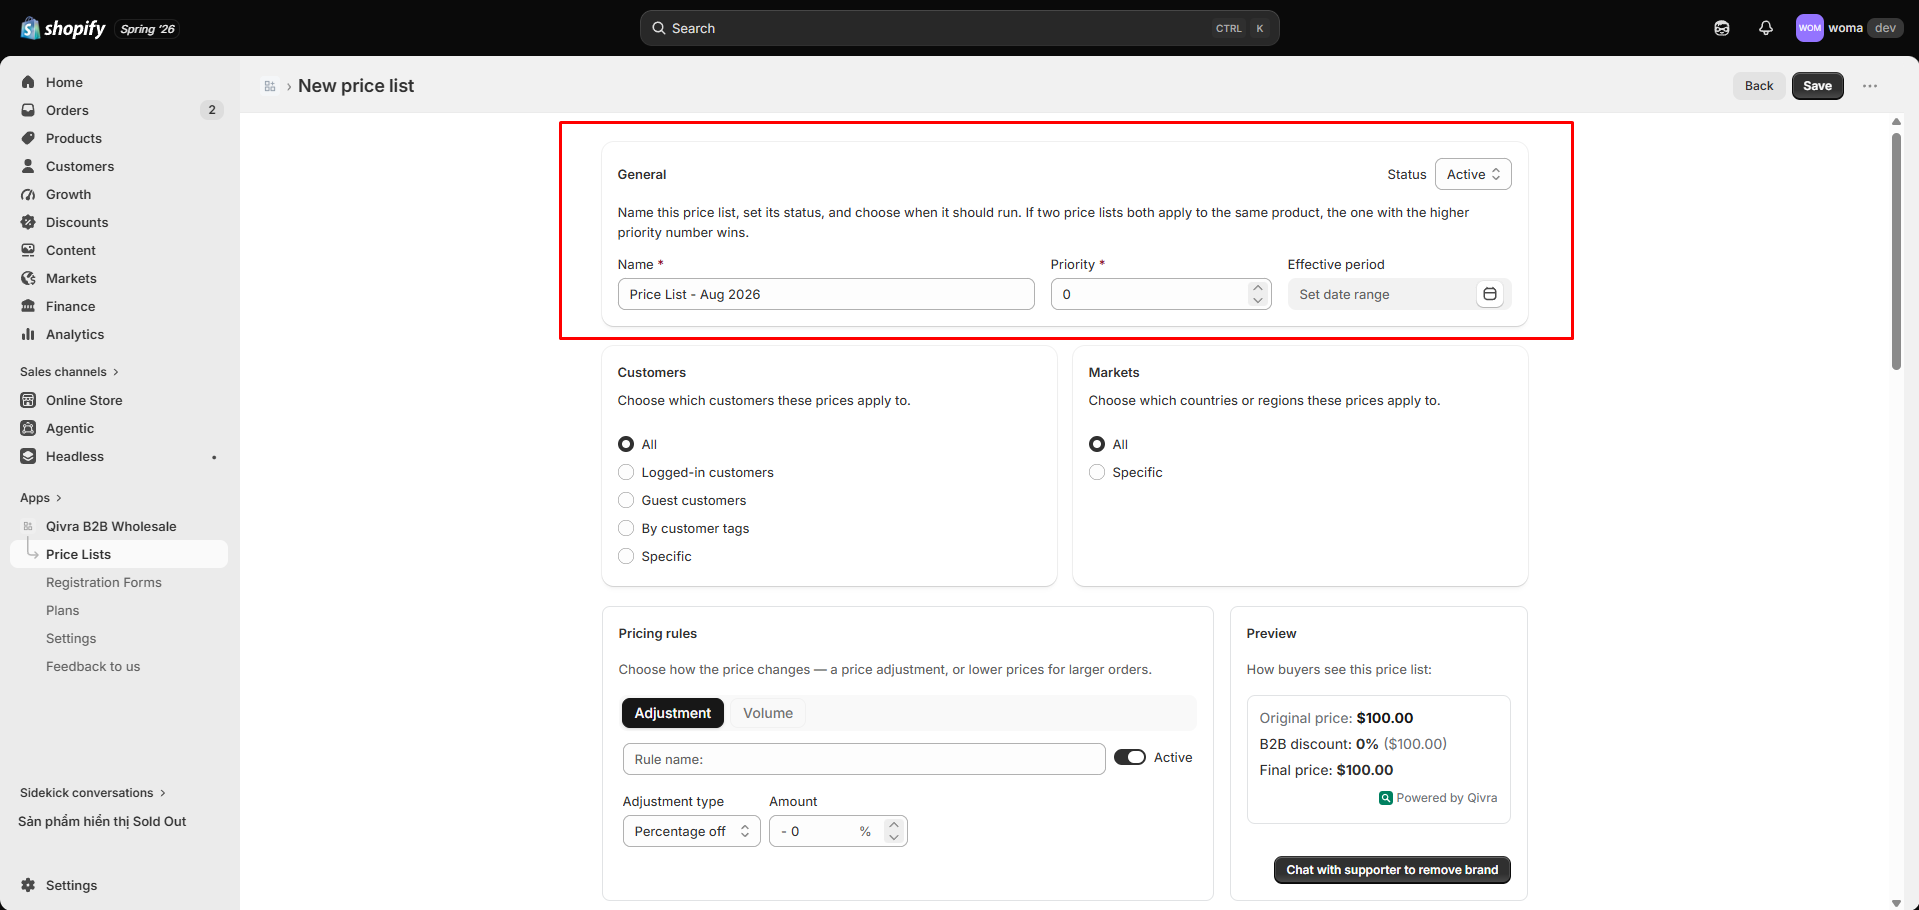
Section titled “Step 2: Fill in the General settings”- Name — a label to recognize the list later (e.g. “VIP Wholesale — 15% off”).
- Status — Active or Inactive. Keep it Inactive while configuring; switch to Active when ready. The list needs at least one rule before its pricing is applied.
- Priority — a number. When two lists match the same customer/product, the higher priority wins.
- Effective period (optional) — set a From/To date range to schedule the list. Leave To empty (No end) for an open-ended list.
Step 3: Choose the customers
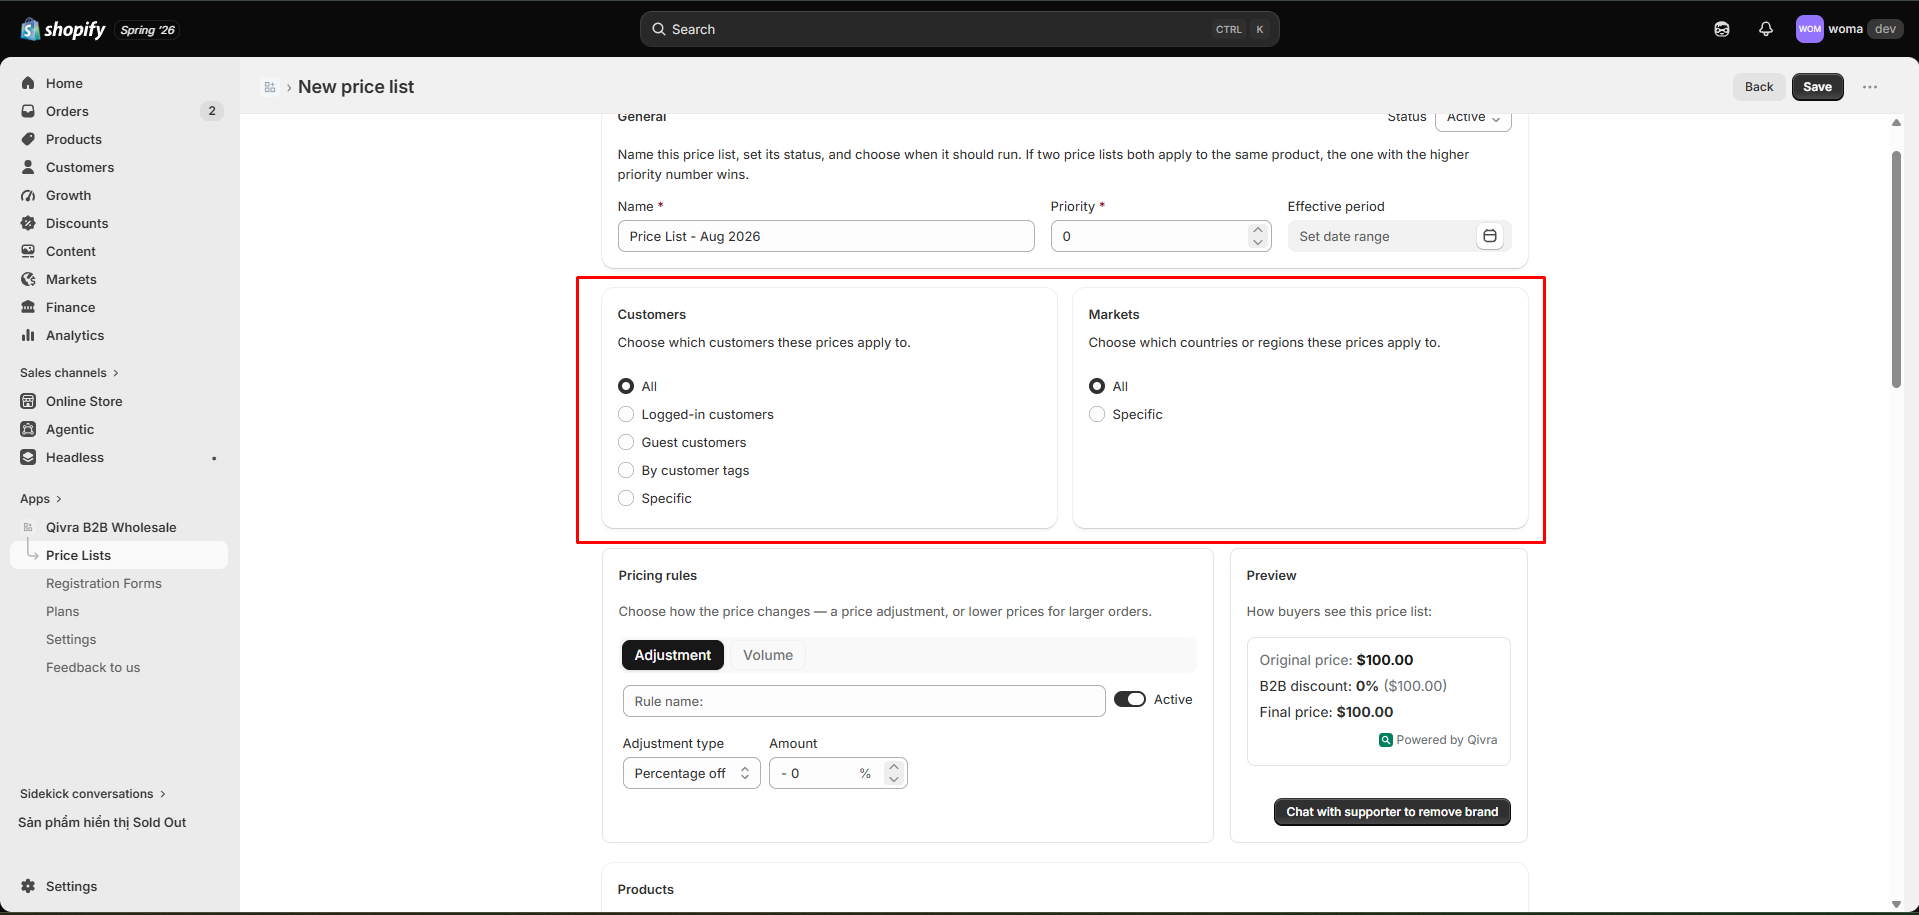
Section titled “Step 3: Choose the customers”Under Customer selection, pick one:
- All — every shopper.
- Logged-in customers — only signed-in accounts.
- Guest customers — only shoppers who are not signed in.
- By customer tags — customers with any of the tags you enter (e.g.
wholesale,vip). - Specific — pick individual customers from a picker.
Step 4: Choose the markets
Section titled “Step 4: Choose the markets”Under Market selection, pick one:
- All — every market.
- Specific — pick one or more markets from a picker.
Step 5: Add a pricing rule
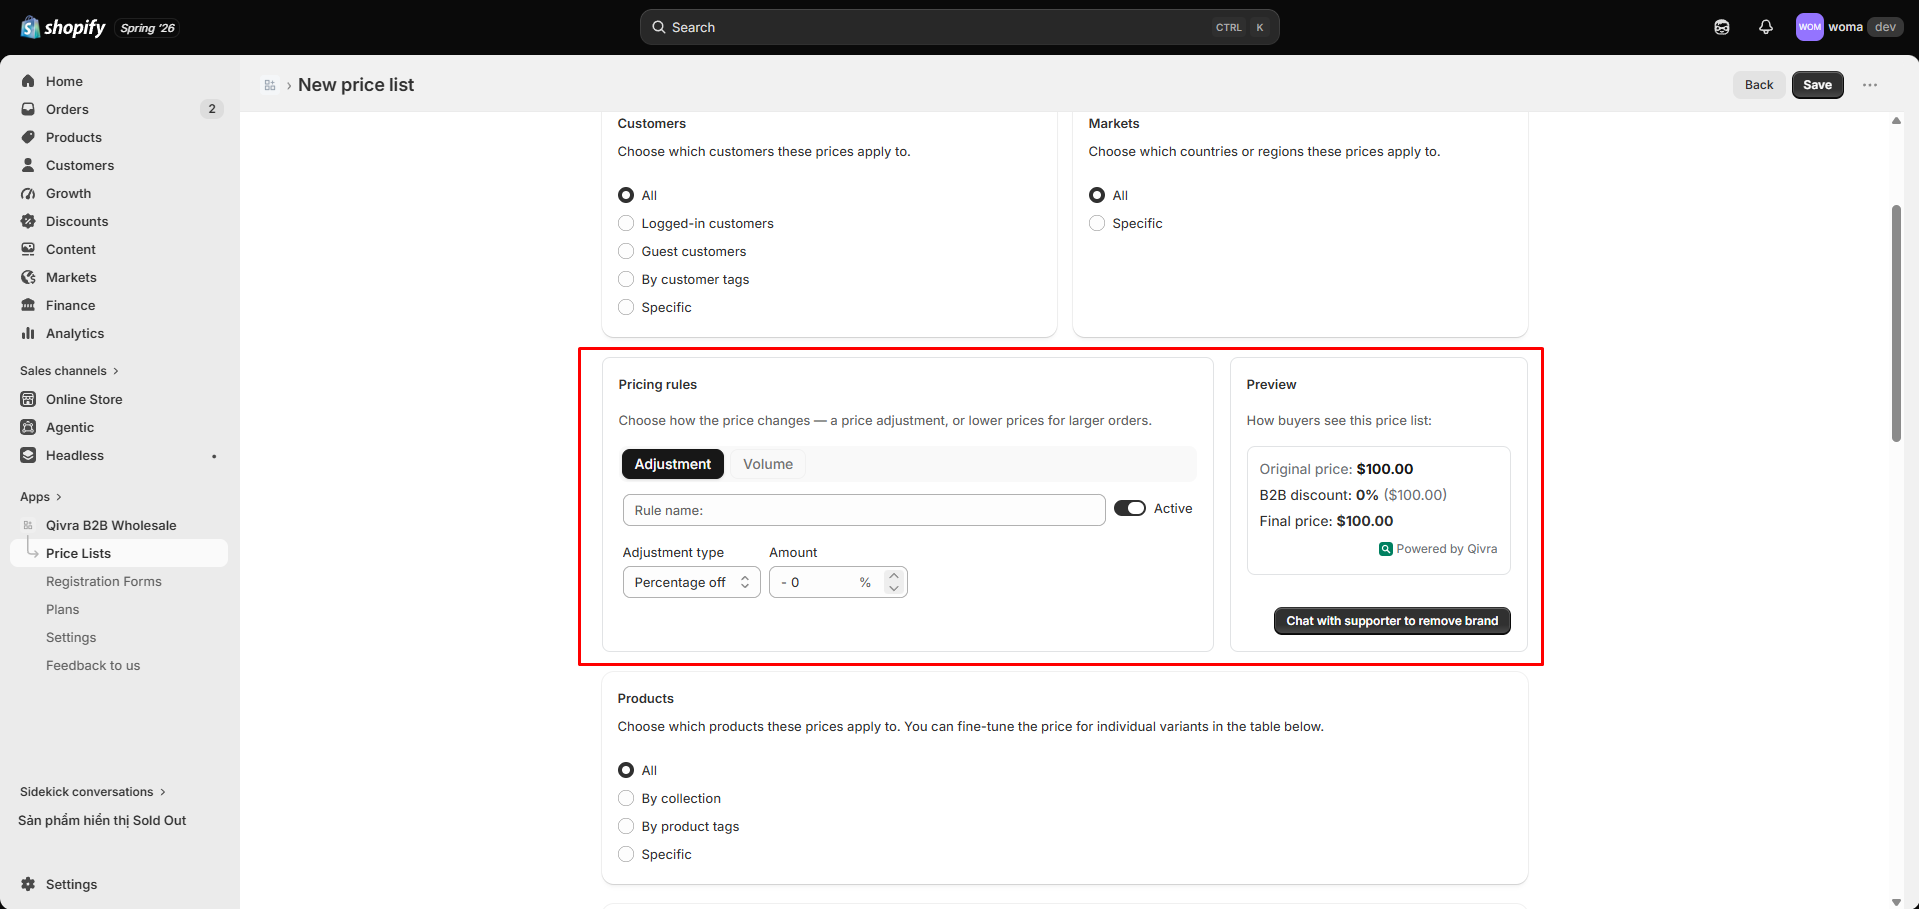
Section titled “Step 5: Add a pricing rule”Open the rules tab and add at least one of:
- Discount — a flat adjustment across the matched products.
- Price break — volume tiers (quantity-based pricing).
A price list needs at least one rule before it can be set to Active. This is the publish guard.
For every field, see Pricing rules: discounts and price breaks.
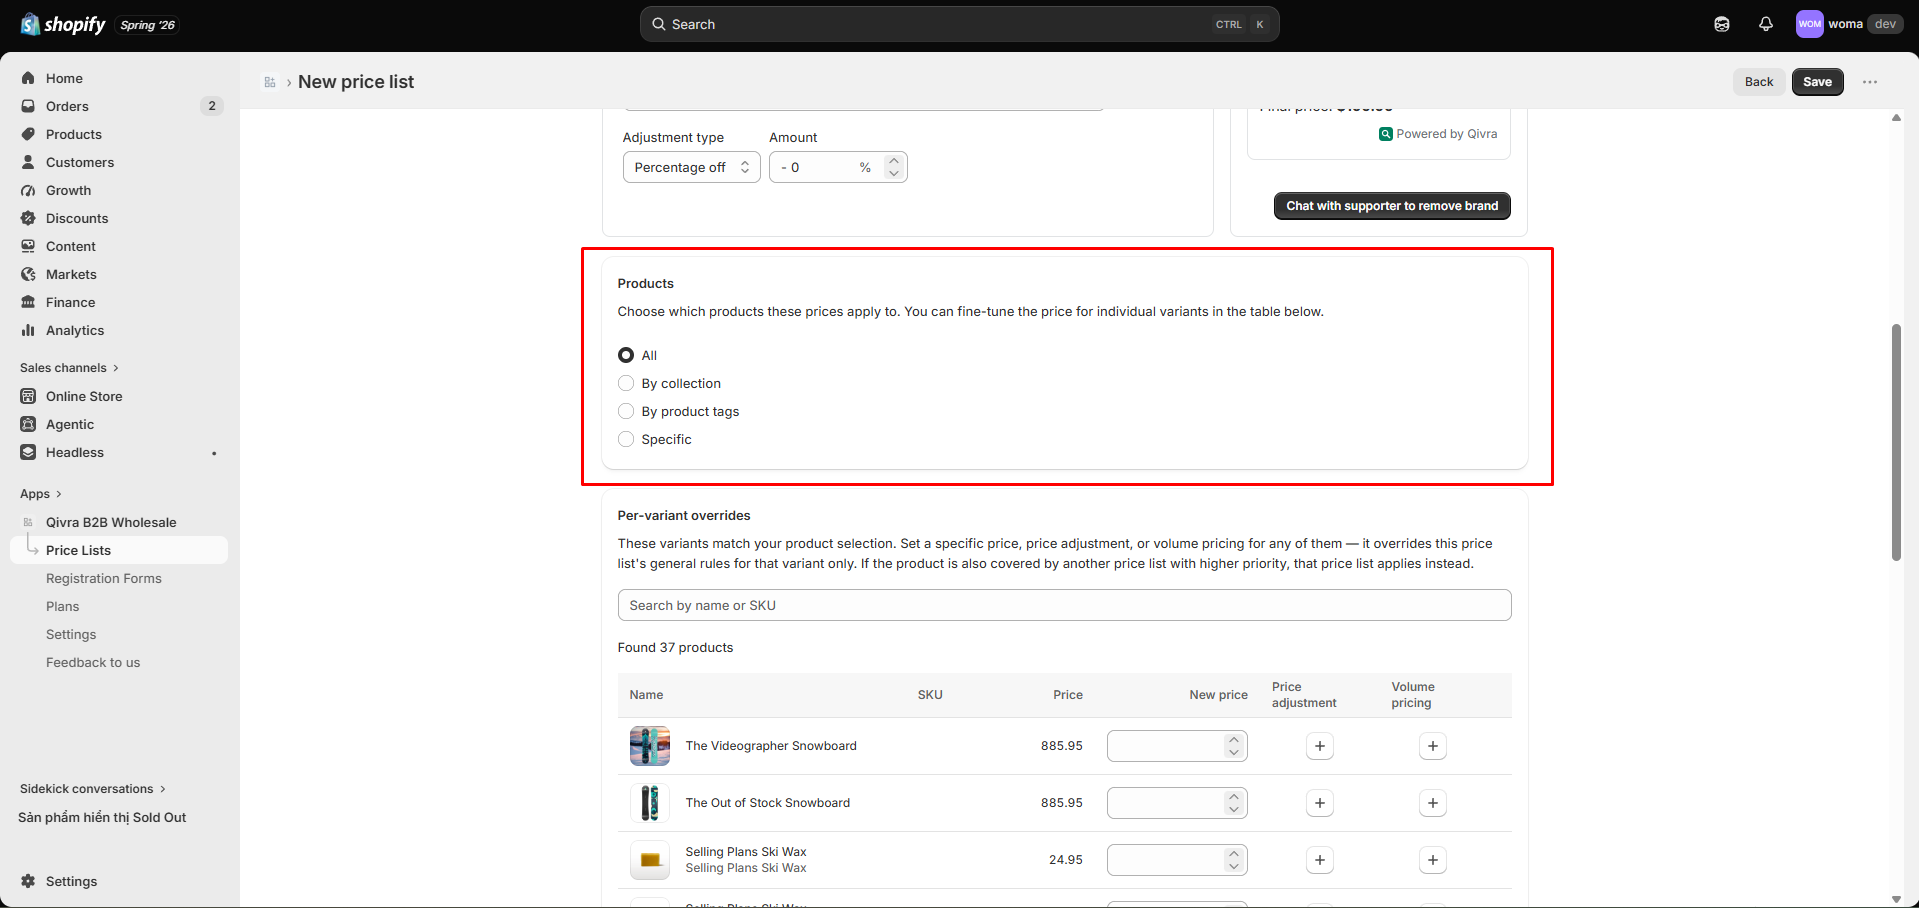
Step 6: Choose the products
Section titled “Step 6: Choose the products”Under Product selection, pick one:
- All — every product on the store.
- By collection — pick one or more collections.
- By product tags — products with any of the tags you enter.
- Specific variants — pick exact variants from the product picker.
See Product selection & per-variant overrides for the override table.
Step 7: Save and activate
Section titled “Step 7: Save and activate”- Click Save.
- Set Status to Active and save again.
- The Metafield sync panel starts pushing your rules to the storefront. Wait for the status to read Up to date.
You can also flip a list between Active and Inactive later, straight from the price lists table.
Step 8: Verify on your storefront
Section titled “Step 8: Verify on your storefront”- Make sure the app embed is enabled.
- Log in as a matching customer (or tag a test account).
- Open a product that matches your product selection and confirm the new price appears.
If prices don’t update, see Troubleshooting: B2B prices not showing.
Anatomy of the editor
Section titled “Anatomy of the editor”| Section | Where | What you set |
|---|---|---|
| General | Top of editor | Name, status, priority, effective period |
| Customers | Customer selection | Audience targeting |
| Markets | Market selection | Market targeting |
| Products | Product selection | Product targeting + per-variant overrides |
| Rules | Tabs (Discount, Price breaks) | The actual price adjustments |
Related docs
Section titled “Related docs”- Pricing rules: discounts and price breaks
- Product selection & per-variant overrides
- Customer and market selection
- Priority, status, and effective period
- Metafield sync status