Setup Klaviyo Integration
Klaviyo is a powerful email marketing platform built for e-commerce. This guide shows you how to integrate Klaviyo with Qivra Form Builder to sync customer data and automate marketing.
What This Integration Does
Section titled “What This Integration Does”| Feature | Description |
|---|---|
| Profile Sync | Add form submitters as Klaviyo profiles |
| List Management | Add contacts to specific Klaviyo lists |
| Event Tracking | Track form submissions as events |
| Marketing Automation | Trigger Klaviyo flows from forms |
Prerequisites
Section titled “Prerequisites”Before setting up Klaviyo:
- Have a Klaviyo account
- Know which List to use
- Have API key ready
Getting Klaviyo API Key
Section titled “Getting Klaviyo API Key”Step 1: Get Your Klaviyo Private API Key
Section titled “Step 1: Get Your Klaviyo Private API Key”- Log in to your Klaviyo account.
- Navigate to Account > Settings > API Keys.
- Click Create Private API Key
- Copy the generated key for use in the next step.
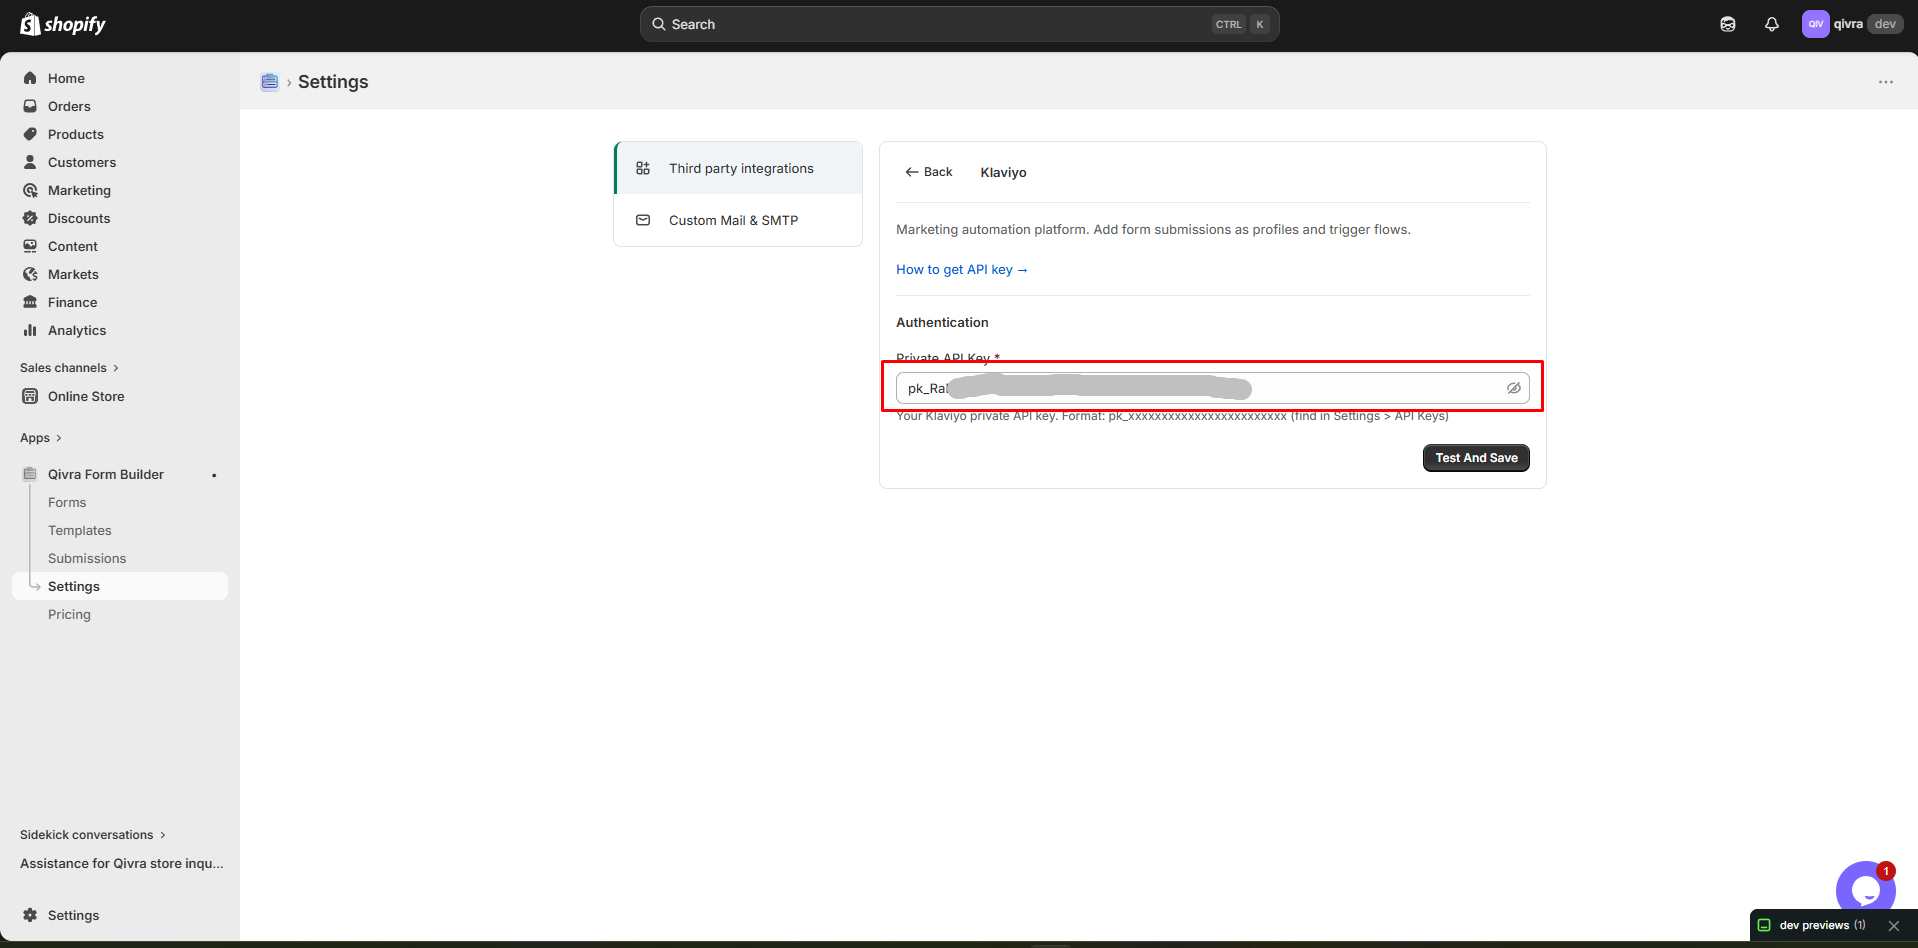
Step 2: Add API Key to Qivra Form Builder
Section titled “Step 2: Add API Key to Qivra Form Builder”- Open the app > click Settings > Third party integration > hover Klaviyo
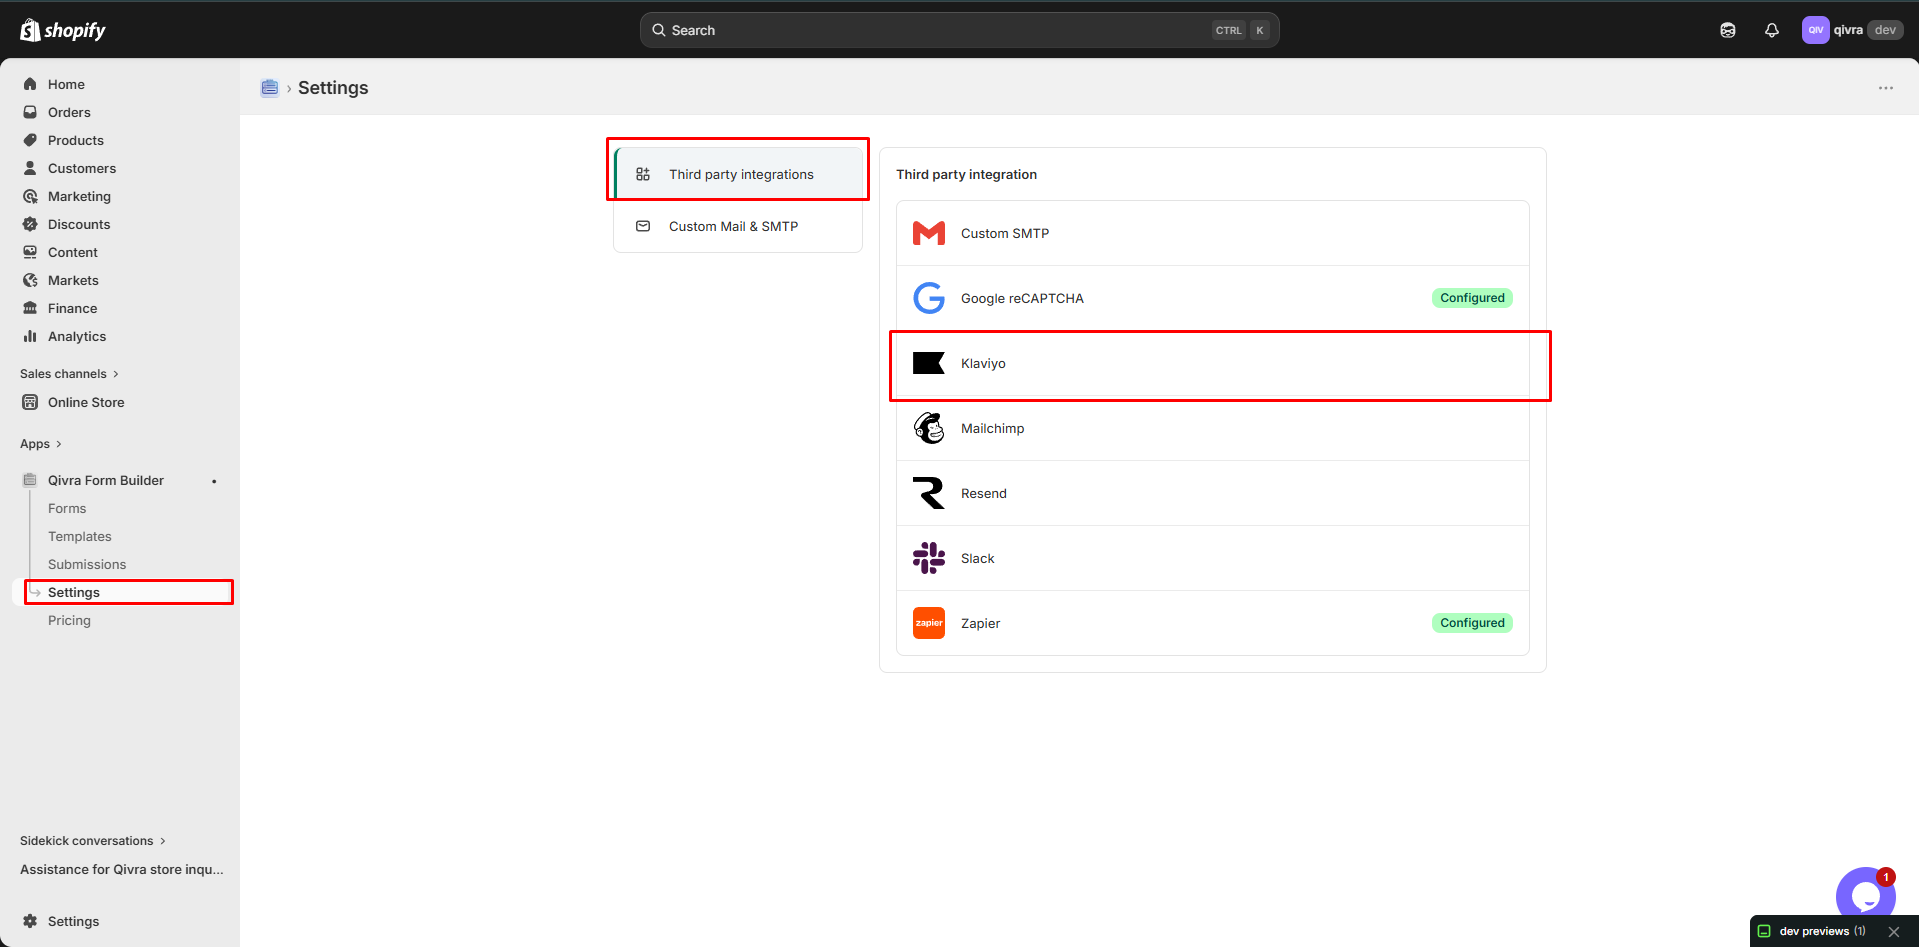
- In Klaviyo API key field, paste the API key created in the step 1
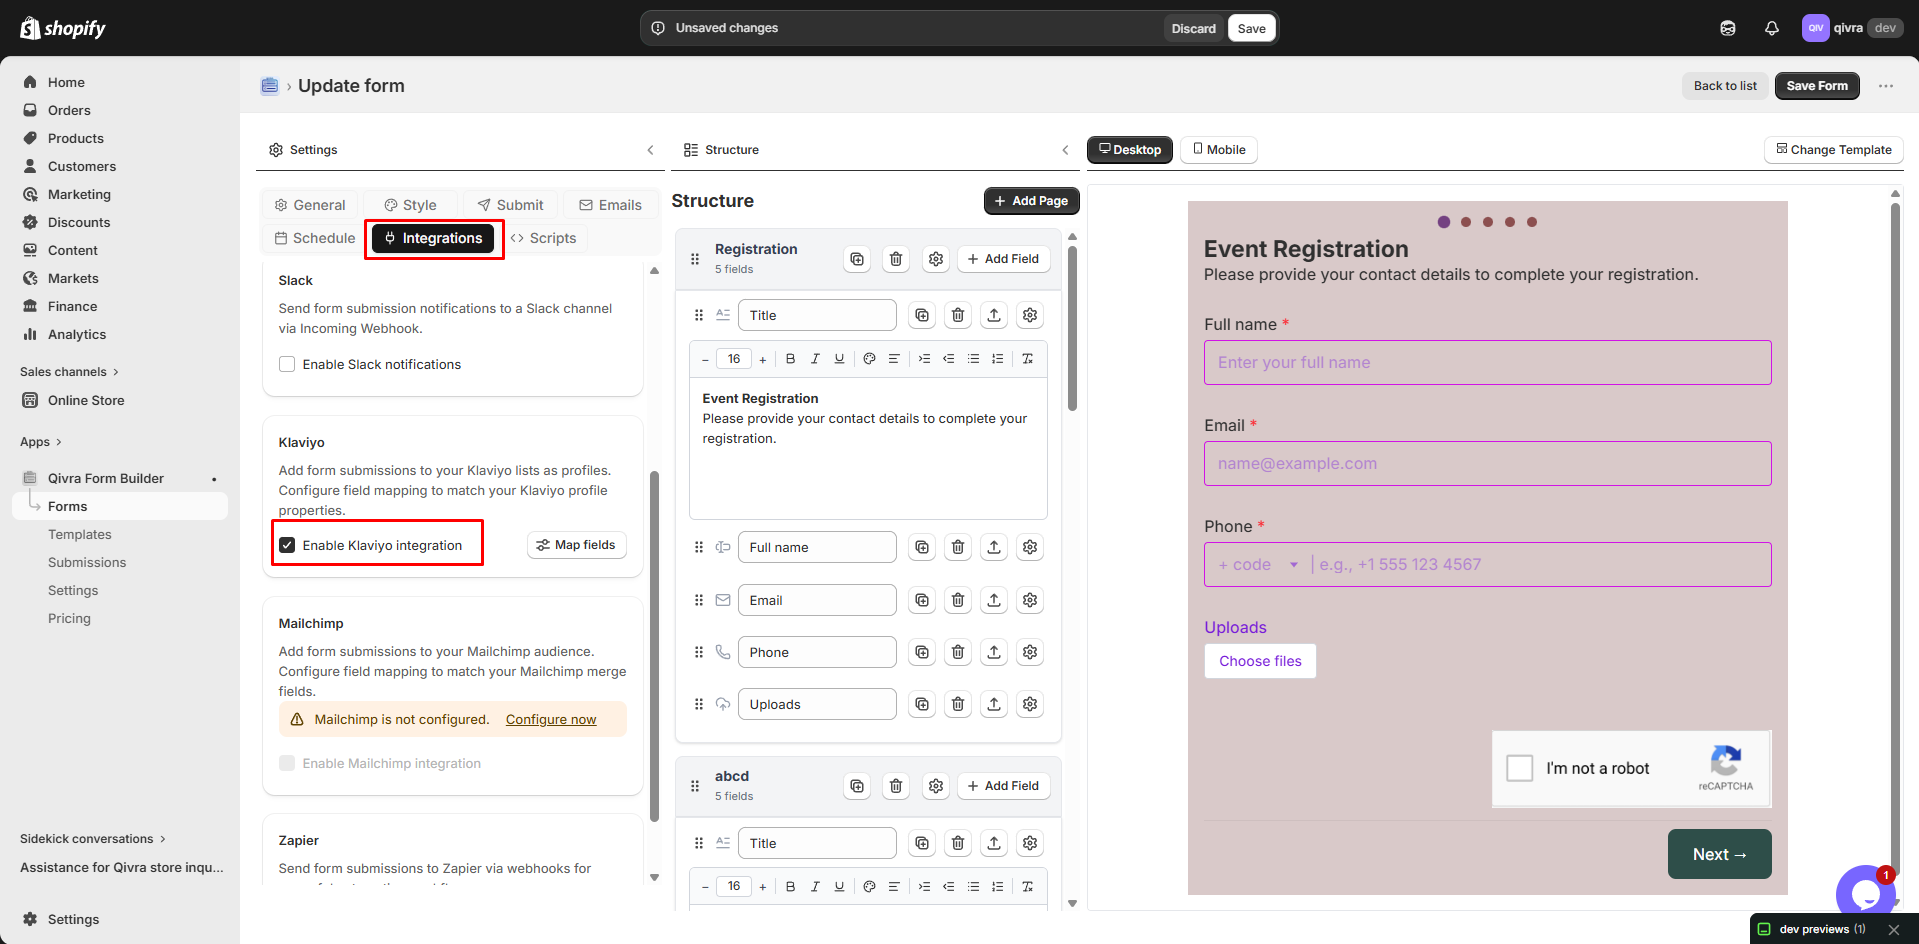
Step 3: Choose Your Klaviyo List
Section titled “Step 3: Choose Your Klaviyo List”- Open the app > click Forms > open the form you want to deal with
- Click Integration on the settings > turn on Klaviyo option > click on the kalviyo option
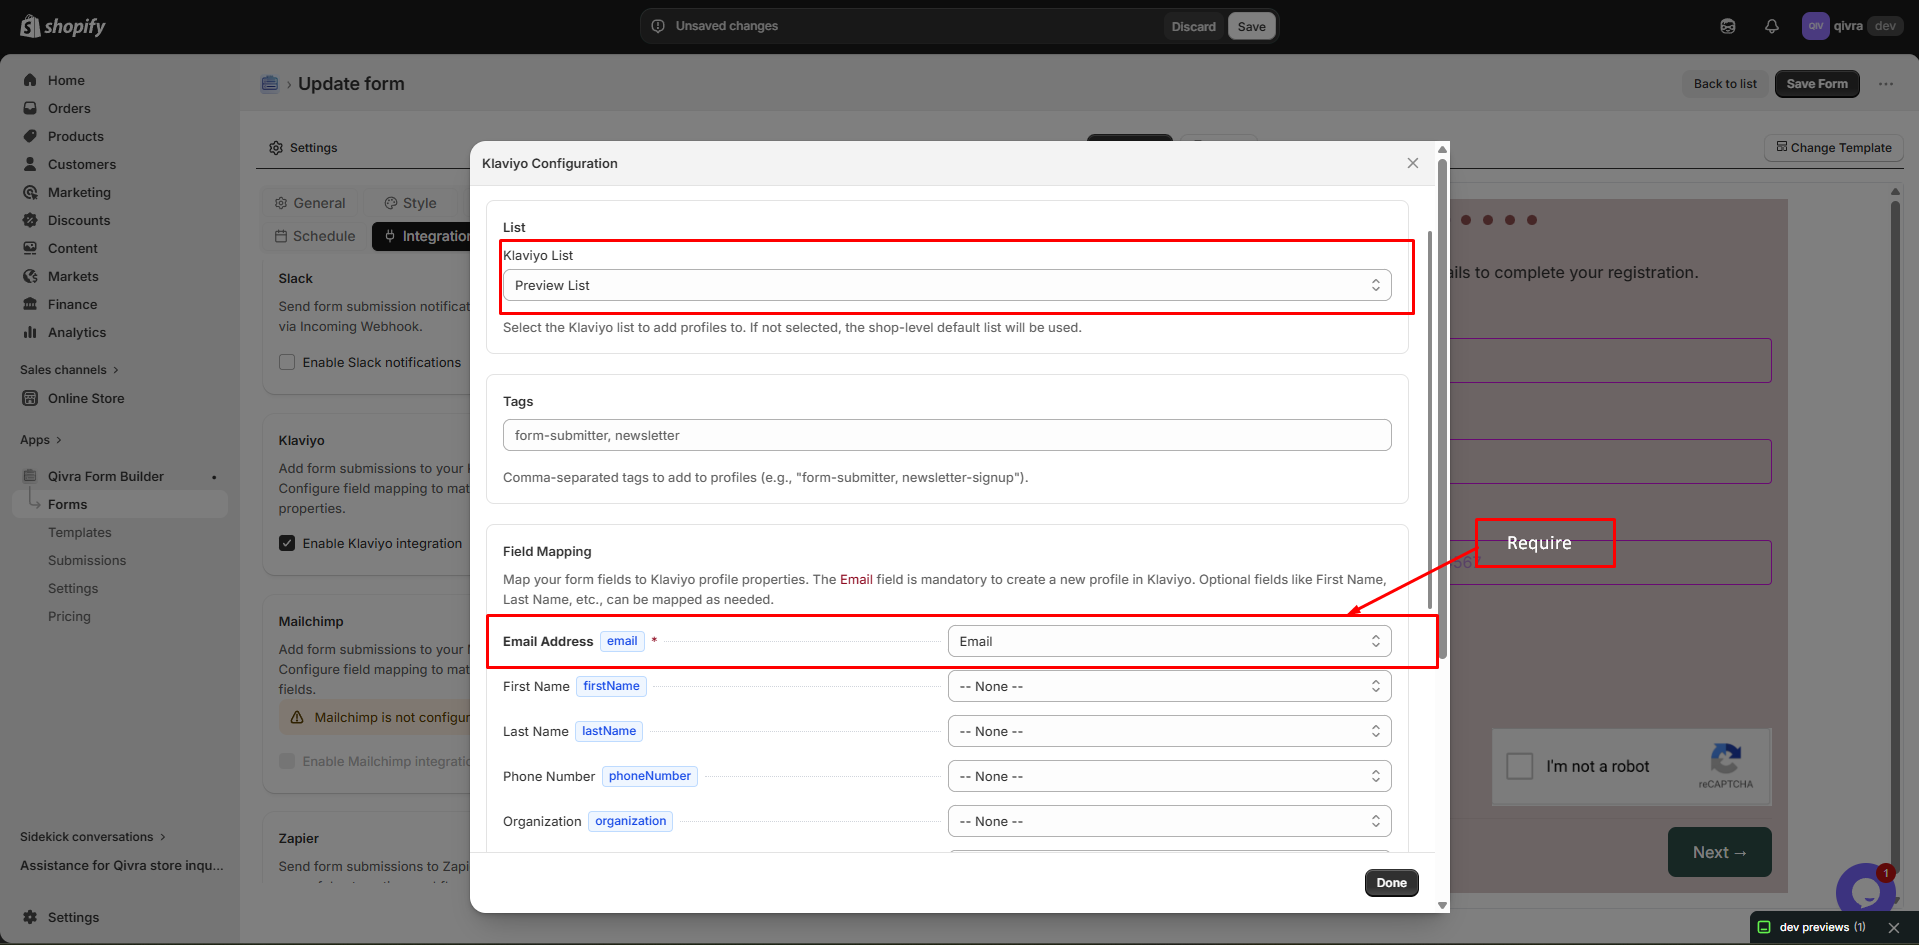
Step 4: Map Your Form Fields to Klaviyo Properties
Section titled “Step 4: Map Your Form Fields to Klaviyo Properties”- The Email field is mandatory to create a new profile in Klaviyo
- Optional fields like First Name, Last Name, etc., can be mapped as needed. Example: Map the “First Name” field in your form to the “First Name” property in Klaviyo
Step 5: Publish & Test Your Form
Section titled “Step 5: Publish & Test Your Form”If the form is published, you just need to save the form after you make changes.
How It Works
Section titled “How It Works”- A customer submit the form.
- Customer email address is added to the Klaviyo list.
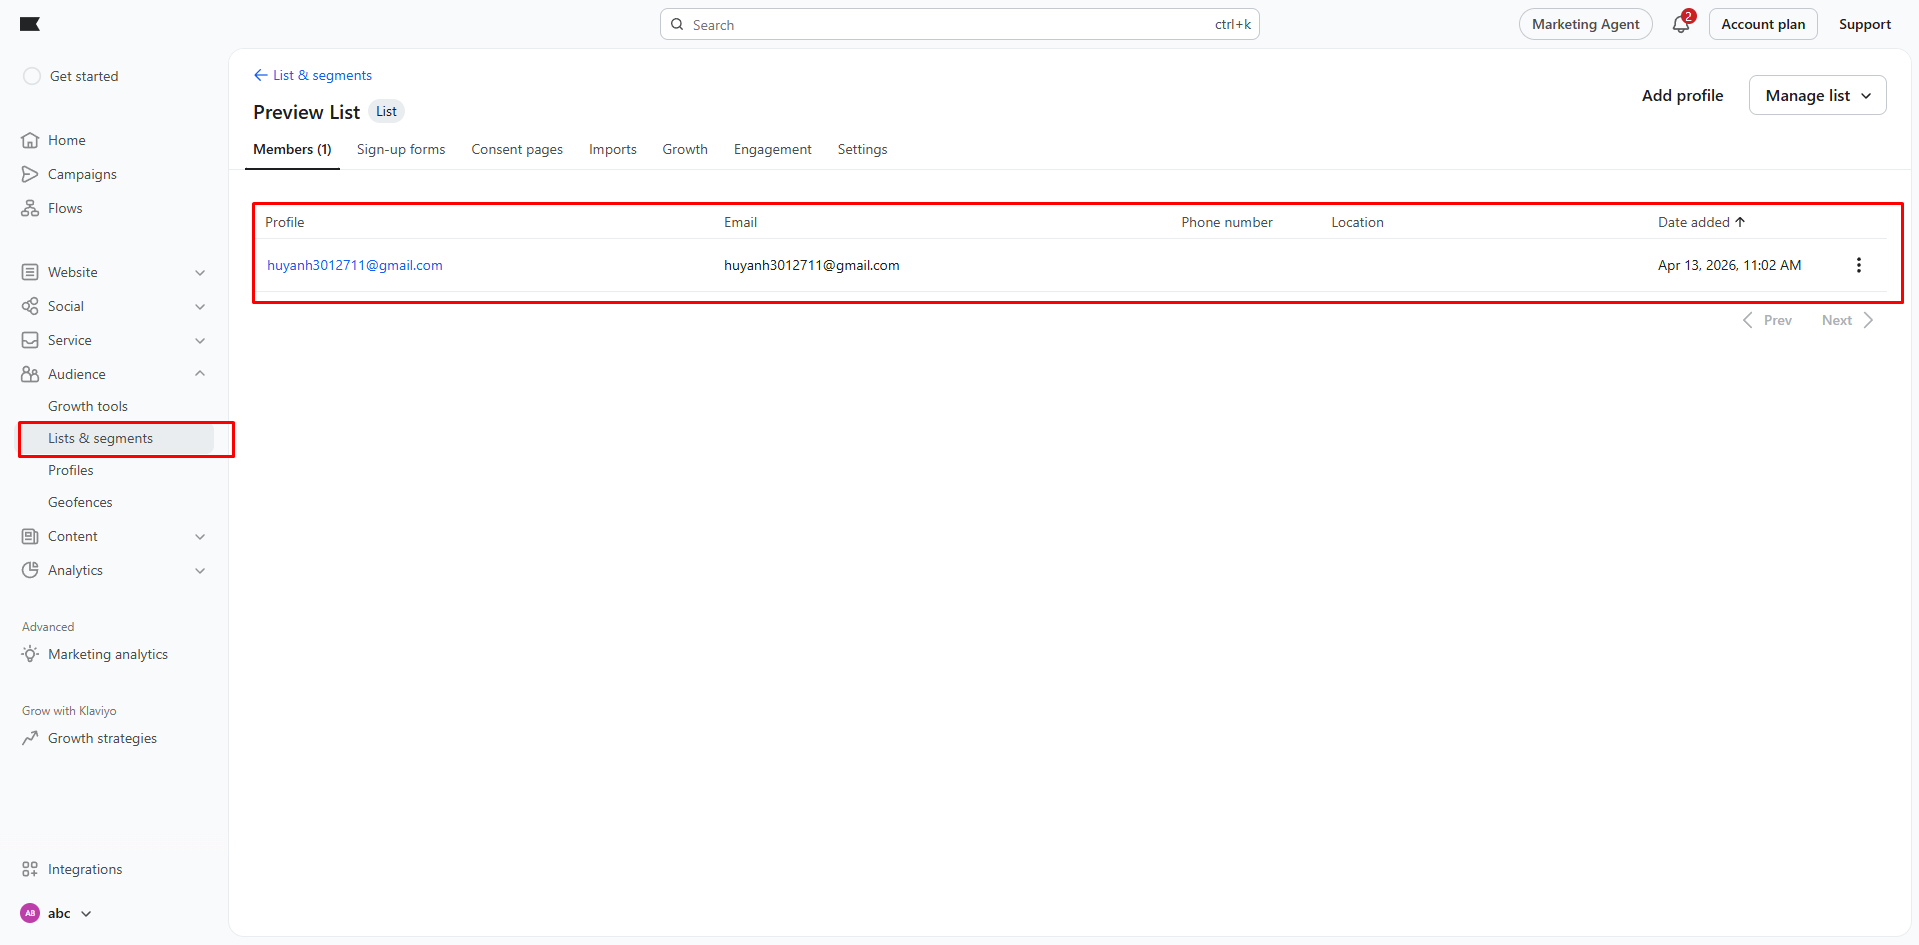
How to check the Klaviyo list:
- Log in to your Klaviyo account > go to Audience > Lists & Segments.
- Open the list you integrated with your form > Check for the new subscriber profile to confirm data has been added successfully.
- You can create the flow with the selected it in your Klaviyo account.
Event Tracking
Section titled “Event Tracking”Track Form Submissions
Section titled “Track Form Submissions”Send events to Klaviyo when forms are submitted:
- Enable Track Events in settings
- Set event name (e.g., “Form Submitted”)
- Include event properties
Event Properties
Section titled “Event Properties”Include submission data in events:
| Property | Description |
|---|---|
| Form Name | Which form was submitted |
| Form ID | Unique form identifier |
| Submission Data | Selected field values |
Using Events in Flows
Section titled “Using Events in Flows”Create Klaviyo flows triggered by form submissions:
- In Klaviyo, go to Flows
- Create new flow
- Trigger: “Metric” > Select your form event
- Build your automation
Per-Form Settings
Section titled “Per-Form Settings”Different Lists per Form
Section titled “Different Lists per Form”Use different lists for different forms:
- Open form in Form Builder
- Go to Settings > Integrations
- Select Klaviyo
- Choose specific list
Form-Specific Events
Section titled “Form-Specific Events”Track different events for different forms:
| Form | Event Name |
|---|---|
| Contact Form | ”Contact Form Submitted” |
| Newsletter | ”Newsletter Signup” |
| Wholesale | ”Wholesale Inquiry” |
Custom Profile Properties
Section titled “Custom Profile Properties”Add custom properties to profiles:
- Map additional form fields
- Create custom properties in Klaviyo
- Use for segmentation
Sync Behavior
Section titled “Sync Behavior”Profile Creation
Section titled “Profile Creation”When form is submitted:
- Klaviyo checks for existing profile (by email)
- Creates new profile or updates existing
- Adds to specified list
- Records event if enabled
Update Settings
Section titled “Update Settings”| Setting | Behavior |
|---|---|
| Update existing | Overwrites profile data |
| Merge data | Adds new data, keeps existing |
| Skip existing | No updates to existing profiles |
Consent Management
Section titled “Consent Management”Handle email consent:
- Set consent status when syncing
- Track subscription source
- Honor unsubscribe requests
Klaviyo Segmentation
Section titled “Klaviyo Segmentation”Using Form Data for Segments
Section titled “Using Form Data for Segments”Create segments based on form submissions:
Properties about someone > Form Source > equals > "Contact Form"Using Events for Segments
Section titled “Using Events for Segments”Segment by form submission events:
Someone did "Form Submitted" > at least once > in the last 30 daysUsing Tags
Section titled “Using Tags”Add tags for easy segmentation:
- Include tags in profile properties
- Create tag-based segments
- Target specific audiences
Troubleshooting
Section titled “Troubleshooting”Profiles Not Syncing
Section titled “Profiles Not Syncing”| Cause | Solution |
|---|---|
| Invalid API key | Verify and re-enter key |
| Missing email | Ensure form has email field |
| Wrong list ID | Verify list selection |
| API scopes | Check key has required scopes |
Field Mapping Issues
Section titled “Field Mapping Issues”| Issue | Solution |
|---|---|
| Property not syncing | Check mapping is correct |
| Wrong data type | Ensure types match |
| Custom properties | Create in Klaviyo first |
Rate Limits
Section titled “Rate Limits”Klaviyo API limits:
| Tier | Requests/second |
|---|---|
| Free | 10 |
| Paid | Varies by plan |
Klaviyo Pricing Considerations
Section titled “Klaviyo Pricing Considerations”Profile Limits
Section titled “Profile Limits”| Plan | Profiles |
|---|---|
| Free | 250 |
| Varies | |
| Email & SMS | Varies |
Check Klaviyo pricing for current limits.
Best Practices
Section titled “Best Practices”List Hygiene
Section titled “List Hygiene”- Clean inactive profiles regularly
- Remove bounced emails
- Honor unsubscribes promptly
Segmentation Strategy
Section titled “Segmentation Strategy”- Use meaningful tags
- Create clear segments
- Target relevant audiences
Automation Setup
Section titled “Automation Setup”- Create welcome flows for new contacts
- Set up follow-up sequences
- Track conversion metrics