Create Form with AI
Qivra Form Builder includes an AI-powered form generator that creates complete forms based on your description. Instead of building from scratch, simply describe what you need and AI will generate the layout, fields, and structure for you.
What is AI Form Builder?
Section titled “What is AI Form Builder?”The AI Form Builder uses artificial intelligence to:
| Feature | Description |
|---|---|
| Generate fields | Creates appropriate field types based on your description |
| Build structure | Organizes fields into logical groups or steps |
| Set defaults | Configures labels, placeholders, and required settings |
| Add logic | Suggests conditional logic rules when relevant |
When to Use AI Form Builder
Section titled “When to Use AI Form Builder”| Use Case | Benefit |
|---|---|
| Quick setup | Create forms in seconds instead of minutes |
| Best practices | AI applies form design best practices automatically |
| Inspiration | Not sure what fields to include? AI suggests them |
| Complex forms | AI can handle multi-step forms with conditional logic |
How to Create a Form with AI
Section titled “How to Create a Form with AI”Step 1: Open AI Form Builder
Section titled “Step 1: Open AI Form Builder”- Go to Qivra Form Builder
- Click “Create Form”
- Select the “Create with AI” option
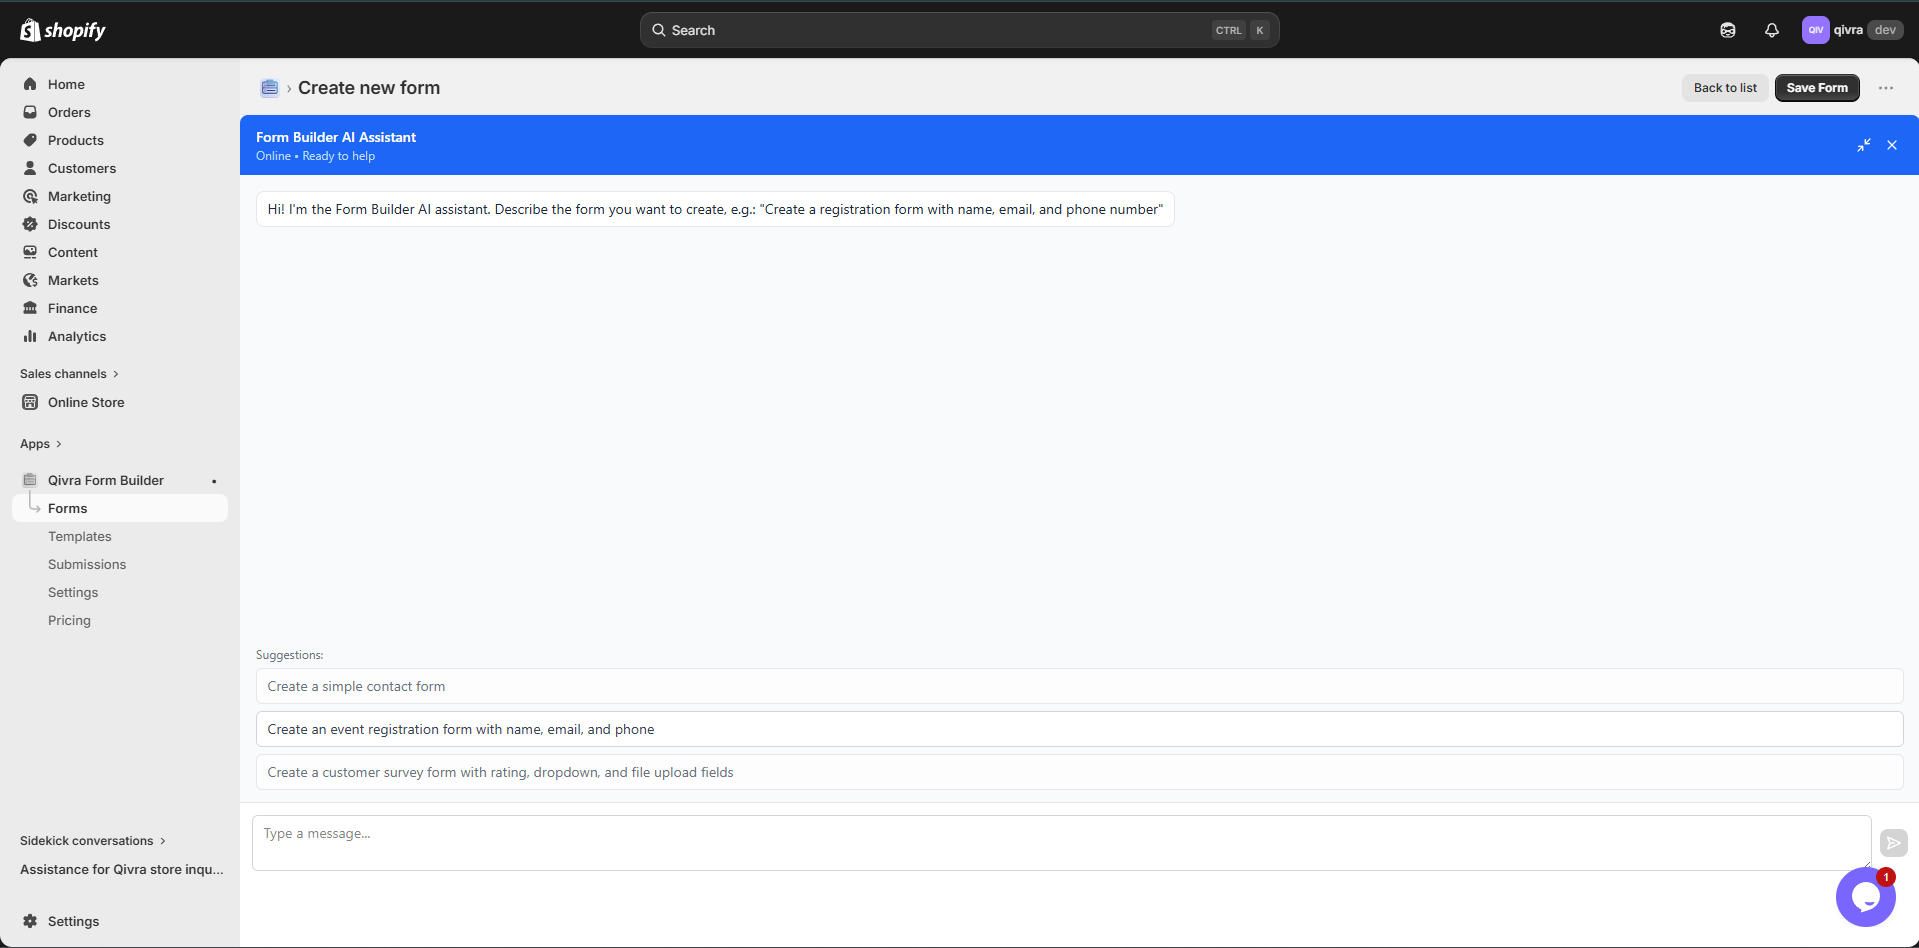
Step 2: Describe Your Form
Section titled “Step 2: Describe Your Form”Enter a description of what you need. Be specific about:
- The purpose of the form (e.g., “contact form”, “product inquiry”, “warranty registration”)
- Who will fill it out (customers, B2B clients, job applicants)
- What information you need to collect
- Any specific fields you want included
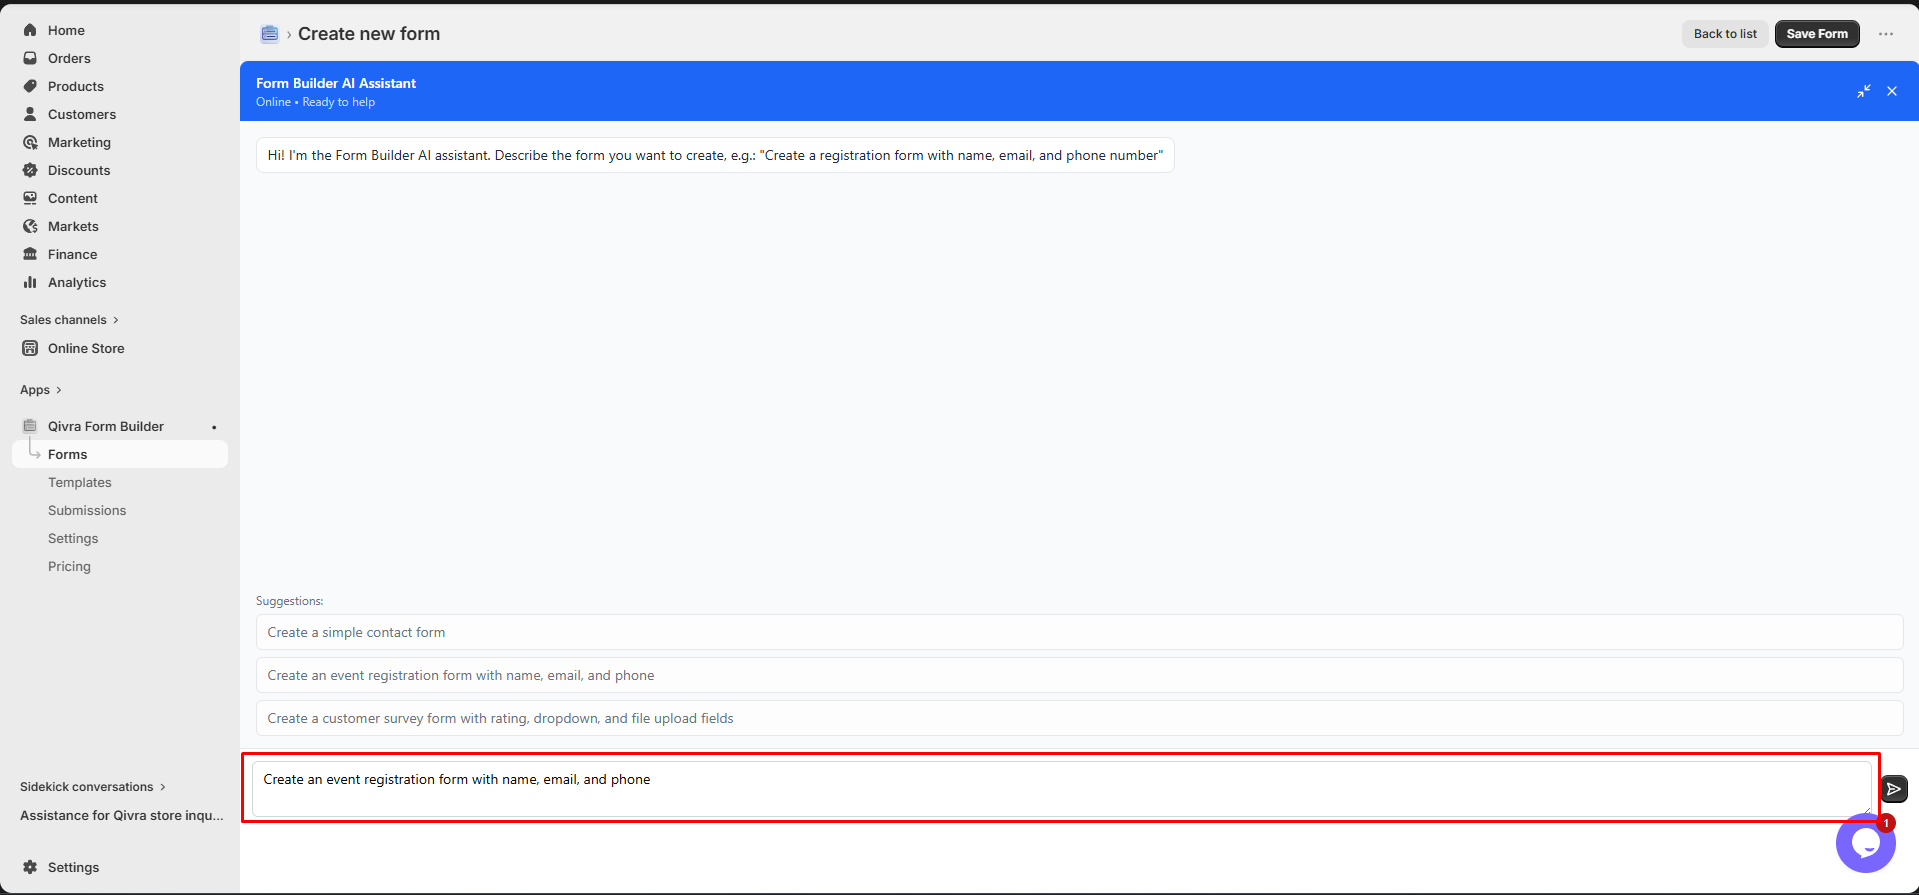
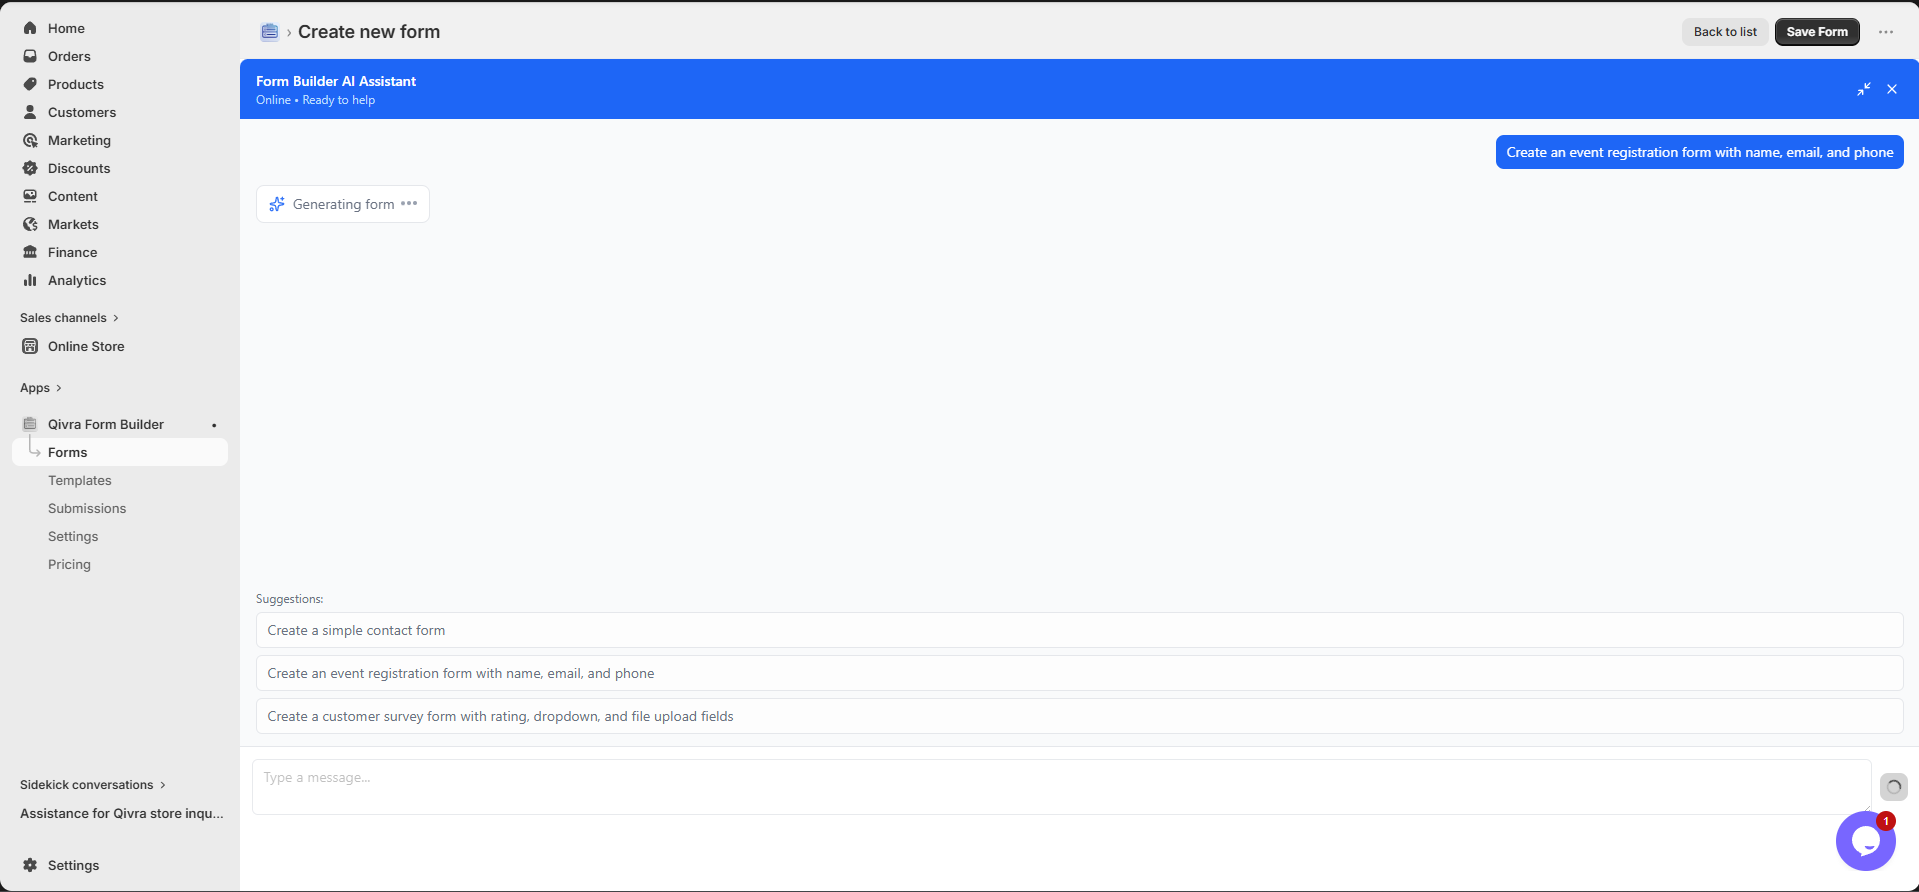
Step 3: Generate the Form
Section titled “Step 3: Generate the Form”Click “Generate” and wait for AI to create your form. The AI will:
- Analyze your description
- Select appropriate field types
- Set up field labels and validation
- Organize the form structure
- Suggest any conditional logic
Step 4: Review and Customize
Section titled “Step 4: Review and Customize”After AI generates the form:
- Review all fields and settings
- Adjust any field labels or options
- Add or remove fields as needed
- Configure conditional logic
- Set up email notifications
- Customize styling

Step 5: Save and Publish
Section titled “Step 5: Save and Publish”- Click “Save” to save the form
- Configure display settings (trigger type, position)
- Add the form to your store
Example Prompts
Section titled “Example Prompts”Contact Form
Section titled “Contact Form”Create a contact form for my online store. I need customer name,email, phone number, subject (dropdown: Order Question, ProductInquiry, Shipping, Returns, Other), and a message field. Makeemail and message required.Product Inquiry Form
Section titled “Product Inquiry Form”Create a product inquiry form that lets customers ask aboutspecific products. Include product selector, customer name,email, phone, and a message. Add a dropdown for inquiry type(Price, Availability, Custom Order, Technical Question).Warranty Registration
Section titled “Warranty Registration”Create a warranty registration form with customer name, email,phone, address, product selector, purchase date, serial number,and file upload for receipt. Make all fields required exceptphone and serial number.Survey Form
Section titled “Survey Form”Create a customer satisfaction survey with star rating foroverall experience, dropdown for how they found us (Google,Social Media, Friend, Advertisement, Other), textarea forfeedback, and checkbox for newsletter signup.Wholesale Inquiry
Section titled “Wholesale Inquiry”Create a wholesale inquiry form with company name, contactname, email, phone, business address, tax ID, productselector (multiple), estimated order quantity, and a messagefield. This is a multi-step form with 3 steps.Tips for Better AI Results
Section titled “Tips for Better AI Results”Be Specific
Section titled “Be Specific”| Vague | Specific |
|---|---|
| ”a form" | "a product return request form" |
| "some fields" | "name, email, order number, reason" |
| "a good form" | "a contact form with validation” |
Include Context
Section titled “Include Context”Mention:
- Your industry (e.g., fashion, electronics, food)
- The form’s purpose (e.g., lead generation, support)
- Required vs optional fields
- Any special field types (file upload, product selector)
Specify Structure
Section titled “Specify Structure”If you want:
- Multi-step form: Mention “multi-step” and how many steps
- Conditional logic: Describe what should show/hide when
- Specific layout: Mention field grouping or layout preferences
After AI Generation
Section titled “After AI Generation”Customize Fields
Section titled “Customize Fields”After AI creates the form, you can:
| Action | How |
|---|---|
| Edit field labels | Click field, change label text |
| Make required/optional | Toggle required in field settings |
| Add placeholder text | Enter in field settings |
| Change field type | Replace with a different type |
| Reorder fields | Drag and drop to rearrange |
Add Features
Section titled “Add Features”Enhance the AI-generated form with:
- Conditional logic for dynamic behavior
- Custom styling to match your brand
- Email notifications for admin and customer
- File upload fields for attachments
- Multi-step breakdown for long forms
Test the Form
Section titled “Test the Form”- Fill out every field
- Test required field validation
- Check conditional logic behavior
- Verify file uploads work
- Submit and check email notifications
Limitations
Section titled “Limitations”| Aspect | Detail |
|---|---|
| Accuracy | AI may not always choose perfect fields - review and adjust |
| Language | Works best with English descriptions |
| Complexity | Very complex forms may need manual adjustments |
| Custom CSS | AI doesn’t generate custom CSS |